A lofty sleeping bag has a blind spot.
At 2 a.m., a camper in a winter-rated bag rolls onto one side and feels a chill along the hip. The bag may be doing its job everywhere else. Under the body, though, its insulation is compressed, leaving little loft to slow heat loss into the ground.
The sleeping pad fills that gap. Its R-value describes how strongly it resists heat moving through the pad; a higher number means more insulation. In winter, choosing a pad solely for cushioning can leave the ground-facing side cold even when the bag feels warm on top. Pad warmth belongs in the same packing decision as bag warmth, especially when nights are spent on frozen ground or snow.
What a pad’s R-value actually measures
Heat moves from a warmer body toward colder ground. A sleeping pad slows that transfer: its R-value describes how strongly it resists heat flow. Under the same conditions, a pad rated R-6 lets less heat pass through than one rated R-3. That makes R-value useful for comparing insulation, not just pad thickness or how plush a pad feels.
The most useful comparison is between pads tested under ASTM F3340, a standardized laboratory method for measuring sleeping-pad thermal resistance. Older R-values may come from manufacturers’ own tests or estimates, with different methods and conditions. An older number is not necessarily wrong, but it may not be directly comparable with an ASTM-tested rating. When shopping, check whether the listed value cites the standard.
R-value is not a temperature rating. An R-6 pad, for example, does not promise comfort at a particular air temperature. Ground temperature, sleeping-bag insulation, clothing, and individual cold tolerance all affect how warm a sleeper feels. The number answers a narrower question: how well the pad resists heat loss through the ground.
What R-value works for winter camping?
- Start around R 5 R 5 is a sensible starting point for a winter pad. It offers more insulation beneath the sleeper than a typical three-season pad without treating any one air temperature as a firm boundary. Ground conditions, sleep system and personal cold tolerance still matter.
- Milder winter nights R 4–5 can work for milder winter nights, especially when the forecast is steady and the sleeper knows the rest of the sleep system is warm enough. At the lower end, there is less margin for a colder-than-expected night or a campsite on frozen ground.
- Below-freezing trips R 5–6 is a practical range for typical below-freezing trips. The extra insulation is useful when nights are long and the ground stays cold, even with a suitably rated sleeping bag. For someone buying one pad mainly for winter use, this is often the most useful range to compare.
- Greater cold R 6 or higher is worth considering for sustained cold, exposed camps or anyone who routinely feels cold from underneath. These ranges are planning guides, not temperature ratings: a higher R-value reduces heat loss to the ground but cannot make up for an inadequate bag or damp clothing.
Why the ground changes the equation
A sleeper loses heat wherever the pad touches a cold surface. Frozen soil and exposed rock are dense, so they can draw heat from a thin pad more readily than a layer of loose snow. Rock can feel especially unforgiving when the pad has little insulation or the ground is uneven enough to create pressure points.
Snow contains trapped air, which slows heat transfer compared with direct contact on frozen ground or rock. That does not make snow a substitute for a winter pad: its surface is still cold, and packed snow offers less insulating air space than fresh powder. Even a well-insulated sleeping bag cannot compensate fully for a low-R pad beneath it. Winter’s long nights also leave more hours for a modest heat leak to become noticeable.
A cot changes the problem rather than solving it. Lifting a sleeper off frozen ground removes direct ground contact, but cold air can circulate beneath the cot and carry heat away. A pad or other substantial insulation still belongs between the sleeper and the cot fabric. For a closer look at that trade-off, see how a camping cot compares with a sleeping pad.
Why a warmer sleeping bag is not enough
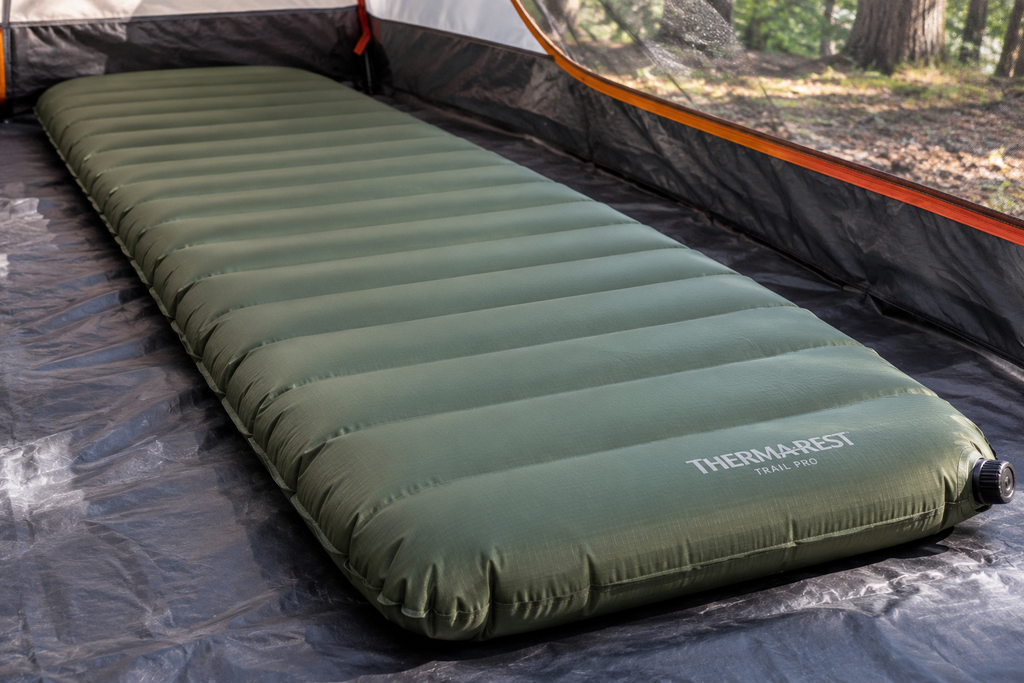
A sleeping bag’s temperature rating can look reassuring on a winter packing list, but it does not describe the whole sleep system. Body weight flattens the insulation beneath the sleeper, reducing its ability to trap warm air. The pad does most of the insulating work on that side, so adding a warmer bag is not a reliable fix for a pad that lets heat escape.
The amount of pad margin worth carrying depends on more than the forecast low:
- Bag warmth: A bag near the limit of its rating leaves little room for heat loss through the pad. A warmer bag helps overall, but does not replace insulation underneath.
- Exposure: A cold, exposed campsite offers less margin for a pad that only just meets the expected conditions.
- Cold tolerance: A person who regularly sleeps cold may appreciate a higher R-value than a warm sleeper using the same bag.
- Pressure points: Side sleepers put more weight on hips and shoulders. A pad that feels thin or lets those areas press close to the ground can feel cold despite a promising R-value.
For an uncertain winter trip, extra pad insulation is usually a more direct safeguard against cold from below than upgrading the bag alone.
How to pair foam with an inflatable pad
-
Start with the tested R-values
A closed-cell foam pad rated R 2 and an inflatable rated R 4.5 give an approximate combined R-value of 6.5. Adding the figures is useful for planning, though the stack may not perform exactly like one R 6.5 pad.
-
Put the foam underneath
The foam adds insulation and separates the inflatable from rough ground. A full-length foam pad is the simplest match; a short one can leave legs and heels on a much colder surface.
-
Check the overlap
Both pads need to stay under the sleeper, especially at the shoulders and hips. If the inflatable is wider than the foam, its edges may have less insulation beneath them.
-
Keep the stack from shifting
Lay the pads on a level tent floor and check whether they slide apart when someone rolls over. Compatible pad straps or a thin non-slip layer can help if they do.
-
Check the stack before the trip
Spend a night on both pads to catch cold spots or slipping. Bring an inflatable repair kit: the foam remains usable if the inflatable loses air, but its R-value alone may fall short of the planned winter setup.
If an inflatable goes flat, the foam still separates the sleeper from the ground. An R 2 foam pad, however, does not become an R 6 winter system on its own; a leak may mean repairing the pad or cutting the trip short.
Choosing between winter-ready pads
-
A rating worth comparing
Check whether the advertised R-value was measured under ASTM F3340, especially when comparing brands. Once pads meet the trip’s insulation target, extra R-value may matter less than how the pad carries and sleeps.
Look forA verified rating that meets the targetAvoidTreating an unverified claim as equivalent -
Warmth that fits in the pack
A high-R inflatable can provide winter insulation with less weight and bulk than a foam-and-inflatable pair. The two-pad setup takes more room but adds a usable foam layer if the inflatable leaks.
Look forA packed size and weight suited to the tripAvoidChoosing by R-value alone -
Room to sleep comfortably
Thickness helps keep hips and shoulders off the ground, while enough width makes it easier to stay on the insulated surface. Pads with more cushioning for side sleepers may be worth their extra weight.
Look forEnough thickness and width for the sleeperAvoidA narrow pad that leaves an arm or hip off the edge -
A setup that works in the cold
Consider puncture resistance and how the pad inflates at camp. A pump sack keeps moisture from breath out of an inflatable and is easier than blowing up a thick pad after a long day.
Look forA manageable inflation method and durable materialsAvoidDiscovering setup is difficult in freezing conditions
Three winter pad myths worth checking
Thickness alone does not establish warmth; the tested R-value is the better comparison.
A tall inflatable can contain little insulation, while a thinner pad may resist heat loss more effectively. If hips feel cold, check whether the inflated pad bottoms out under sleeping weight before dismissing its rating.
Extra bag insulation does little where body weight compresses it beneath the sleeper.
Cold shoulders or hips may also be resting beyond a narrow pad’s insulated area. Check where the body actually lands when lying in a normal sleeping position.
Layers add insulation only where they remain beneath the sleeper.
A foam pad can slide out from under an inflatable, especially on a sloped tent floor. Before adding another layer, check for gaps, shifting pads, and inflation that lets pressure points touch the ground.
Choose a pad for the coldest plausible night, not just the forecast low. Frozen ground, uncertain weather, or a sleeper who often wakes cold all call for extra margin. R 5 is a practical winter starting point; colder conditions or low cold tolerance may warrant R 6 or higher. One pad can meet that target, or a foam pad and inflatable can meet it together if their tested ratings add up and both stay in place.
Before relying on the setup far from shelter, try the complete sleep system on a cold night close to home or a vehicle. Use the intended bag, clothing, and pad arrangement, then check for cold spots at the hips or shoulders. A trial cannot guarantee comfort in harsher weather, but it can reveal a problem while changing plans is still easy.
Gear to Consider
Traverseon sells several sleeping pads — check each listing for its stated R-value before counting on it for cold ground. Prices below are live and update automatically.


![7cm Camping Air Mattress – Waterproof Flocked Air Bed with Pump | Traverseon - Single [ 193 × 65 × 7 cm (76 × 25.6 × 2.76 in) ]](https://cdn.shopify.com/s/files/1/0726/5379/9657/files/O1CN01nElBHO27teC121xJc__2219477317855-0-cib2.jpg?v=1789728653)
See more Traverseon gear → We may earn a commission when you buy through our links, at no extra cost to you.