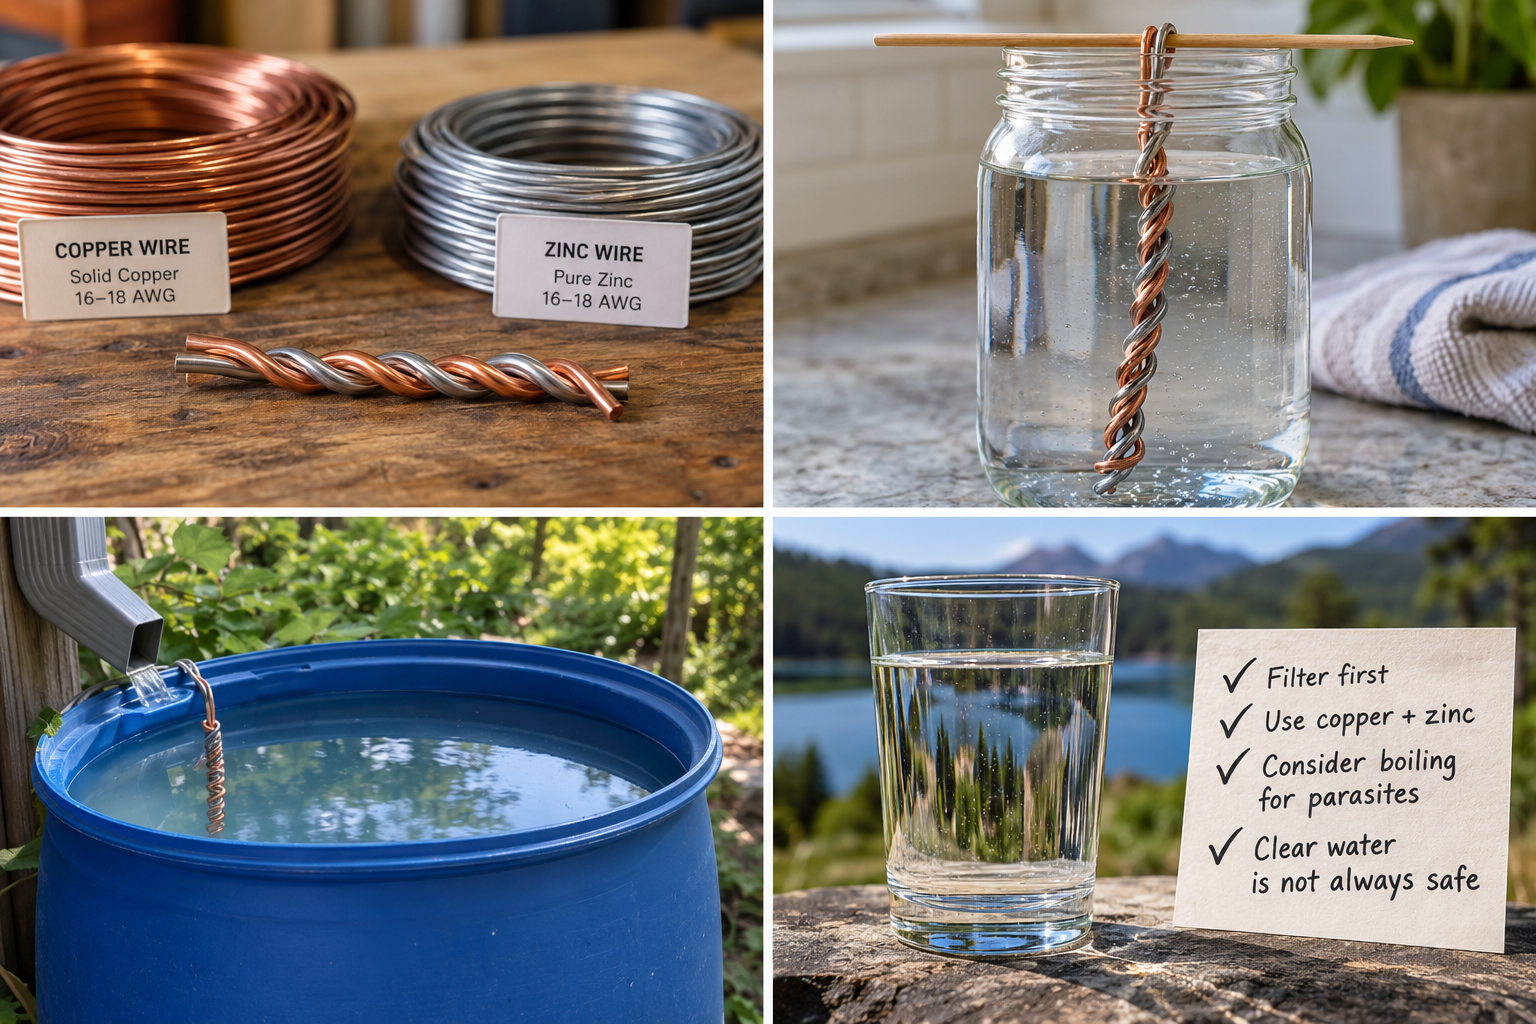
The idea sounds almost too good to be true, and that is worth pausing on. Twist a piece of copper wire against a piece of zinc, drop it in your water, and wait. No batteries, no grid, no filter cartridge to replace. Those two cheap metals really do create a small electrochemical reaction called a galvanic cell, and it is the same chemistry behind the copper-zinc media sold as KDF. But here is the honest part a lot of videos skip: the metals only work when they are touching, wound tightly together, and even then they are one helper in your water plan, not a magic wand. If you are prepping for off-grid storage or an emergency, here is exactly how much to use, what to buy, and where the limits are.
What You’ll Learn
- Copper and zinc form a galvanic cell only when the two bare metals are in firm, direct contact, wound or twisted together.
- Roughly how much copper and zinc wire to use per gallon, and why more surface area works faster.
- What to buy at the hardware store and online, and about what it costs.
- Why this goes hand in hand with filtration and never replaces it.
- Which contaminants, like Giardia, Cryptosporidium, and sediment, still need boiling or a physical filter.
Step 1: Understand What Copper and Zinc Do in Water
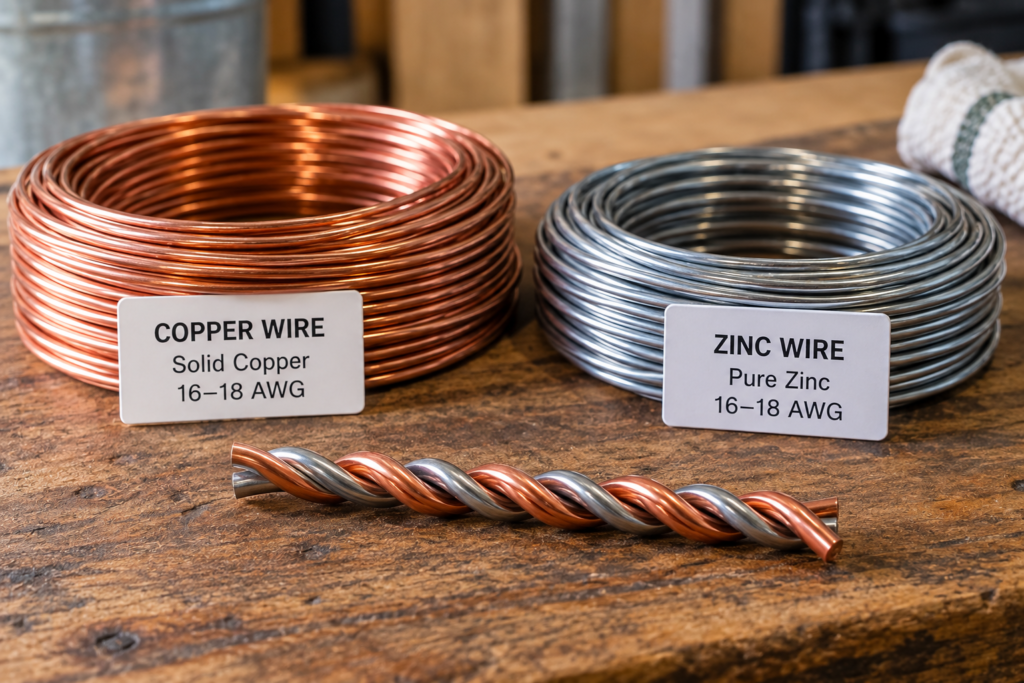
Copper and zinc sit in different spots on the electrochemical series. Zinc is more reactive, so it more readily gives up electrons. Copper is more stable and receives them. When bare copper and pure zinc are tightly connected and dropped in water, electrons move from the zinc to the copper, and the water completes the circuit. You have built a tiny, self-powered battery: a galvanic cell.
Our pick for grab-and-go water: a 4-pack of personal water filter straws puts safe drinking water in every bag, car, and kit — see why four beats one.
That small current, on the order of a few hundred millivolts, is what drives the useful effects. It is the same broad principle used in KDF media, a high-purity copper-zinc material found in some commercial filters, cooling systems, and industrial setups.
The reaction is usually described as having three main effects:
- Reduction of free chlorine: the reaction can convert dissolved chlorine into chloride, a much less reactive compound that you cannot taste or smell.
- Interaction with some dissolved metals: metals such as lead, mercury, arsenic, and chromium may be drawn toward and deposited on the metal surfaces.
- Antimicrobial action: the electrical activity and reactive oxygen species near the metals make conditions less friendly for bacteria, algae, and fungi.
Copper alloys have a well-recognized antimicrobial reputation. Even so, copper-zinc is almost always positioned as a supplementary treatment layer, not a stand-alone replacement for filtration and disinfection.
Step 2: Know the Difference Between Disinfection and Filtration
The single most important idea in this whole guide is simple: a galvanic cell is not a physical filter.
A filter traps and removes particles. A disinfecting process targets living microorganisms. Copper-zinc treatment can affect some bacteria, but it does not strain out mud, leaves, silt, dead microorganisms, or any other suspended material. It has no screen and no pores. Nothing is being removed by size.
That distinction matters for safety and for appearance. Water can be less biologically active and still look cloudy, because the particles are all still floating there. Water can also look crystal clear while holding organisms or dissolved contaminants you will never see. A good system separates the jobs:
- Remove visible debris and sediment first.
- Use copper-zinc as one antimicrobial and chlorine-reduction layer.
- Use charcoal for taste and some organic compounds.
- Use a physical barrier or boiling when parasites are a concern.
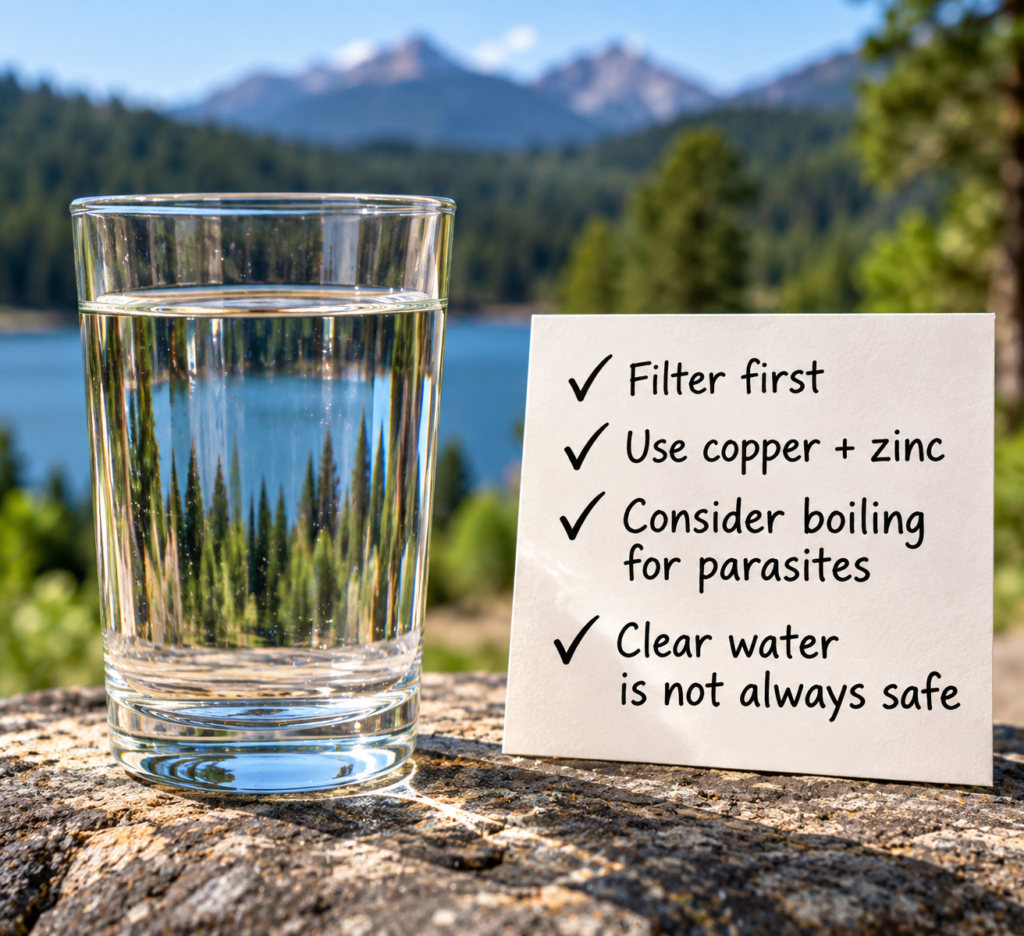
Remember: Never judge water by clarity, smell, or taste alone. Clear water can still be dangerous, and safe-tasting water can still make you sick.
Step 3: Identify What Copper-Zinc Treatment May Help With
A copper-zinc pair earns its place where the goal is to reduce chlorine taste, add an antimicrobial layer to stored water, or support a broader off-grid process. Realistic uses include:
- Municipal water: free chlorine can taste and smell unpleasant, and a copper-zinc stage may soften it.
- Stored rainwater: a larger pair may help discourage algae and bacterial growth in a container.
- Storage tanks and cisterns: the pair can act as a continuous, low-maintenance antimicrobial layer as long as you inspect and replace the zinc.
- Livestock troughs: treatment may help water stay cleaner longer and slow algae.
- Pre-treated water: it works as one component in a system where sediment, organics, and parasites are handled separately.
These are jobs for a treatment layer. None of them is a promise that raw water has become safe to drink.
Step 4: Recognize the Contaminants It Does Not Reliably Solve
The limits matter as much as the benefits, maybe more. Do not rely on a copper-zinc cell alone to handle any of the following:
- Sediment and suspended particles: mud, sand, silt, and debris need a physical prefilter.
- Pesticides and organic chemicals: these are better addressed with activated charcoal or a purpose-built method.
- Parasitic cysts: Giardia and Cryptosporidium have tough outer shells and are not reliably killed by galvanic action.
- Unknown, heavily contaminated water: sewage, animal waste, industrial pollution, mining runoff, or chemical spills should never be trusted after one step.
Standing water, beaver ponds, streams near cattle, and tropical sources all carry real parasite risk. In those cases, boiling for one minute at a rolling boil stays a dependable answer for parasites, and a suitable physical filter can be necessary too. Even the reference literature on copper-zinc filtration warns against leaning on it as your only germicidal treatment. Treat that as a hard line, not a suggestion.
Step 5: Gather the Correct Materials for a Basic Galvanic Pair
For a simple, non-permanent pair, the essentials are short:
- Bare solid copper wire: uncoated copper that can touch the water directly.
- Pure zinc strip, rod, or wire: use pure zinc, not galvanized steel.
- A non-reactive container: a clean canteen, glass jar, food-grade bucket, or pot to hold the water.
A few substitutions will quietly ruin the build:
- Do not use galvanized steel for the zinc. It is iron with a thin zinc coating. Once that coating wears through, the iron underneath corrodes.
- Do not swap in aluminum. Copper and zinc are the intended pairing. Another metal changes the reaction and adds uncertainty you do not want in drinking water.
- Do not use insulated wire unless the insulation is stripped off. Any coating blocks the copper from touching the water and shrinks your usable surface area.
Step 6: Shop Smart: What to Buy and About What It Costs
This is one of the cheapest projects in your whole water kit, which is a big part of the appeal. Both metals are common, and a single build usually lands in the fifteen to twenty-five dollar range, less if you already have wire in a drawer.
For the copper, look for bare, solid copper wire. At a hardware store or home center, the easiest thing to ask for is bare copper grounding wire in 12 or 14 gauge. It is solid, uncoated, and easy to bend and twist. Many stores sell it by the foot, and it runs only about a quarter to forty cents per foot, so a workable length costs pocket change. A small coil is often under ten dollars. Avoid anything labeled tinned, coated, or insulated.
For the zinc, you want a piece marked pure zinc, usually sold as a zinc anode or zinc electrode at 99.9 percent purity or higher. Hardware stores rarely stock plain zinc, so this is the piece most people order online. Two easy formats:
- Zinc anode strips or sheets: small 99.9 percent or higher strips, often sold in multi-packs. A pack commonly runs about ten to twenty dollars and gives you several replacements.
- Zinc ribbon or rod anode: sold by the foot for corrosion control, often around a few dollars per foot. A ribbon is easy to cut and twist against copper wire.
Here is a quick shopping snapshot. Prices move around, so treat these as ballpark figures, not quotes.
| Material | What to look for | About what it costs |
| Bare solid copper wire | Uncoated 12 to 14 gauge, often sold as bare copper grounding wire, by the foot | Roughly 25 to 40 cents per foot; a small coil often under $10 |
| Pure zinc strip or sheet | Zinc anode or electrode, 99.9% purity or higher; never galvanized | Often about $10 to $20 for a multi-pack of strips |
| Pure zinc ribbon or rod | Zinc ribbon anode sold for cathodic protection, by the foot | Commonly a few dollars per foot |
| Non-reactive container | Clean glass jar, canteen, food-grade bucket, or pot | Usually already on hand |
| Optional: KDF-55 granules | Copper-zinc redox media, sold by the pound, for larger builds | Sold by the pound; a small bag covers most home setups |
One more shopping note that saves grief later: buy a little extra zinc. Zinc is the metal that gets used up, so a spare strip or two means you are not scrambling when the first one wears thin.
Step 7: Build the Cell So the Copper and Zinc Actually Touch
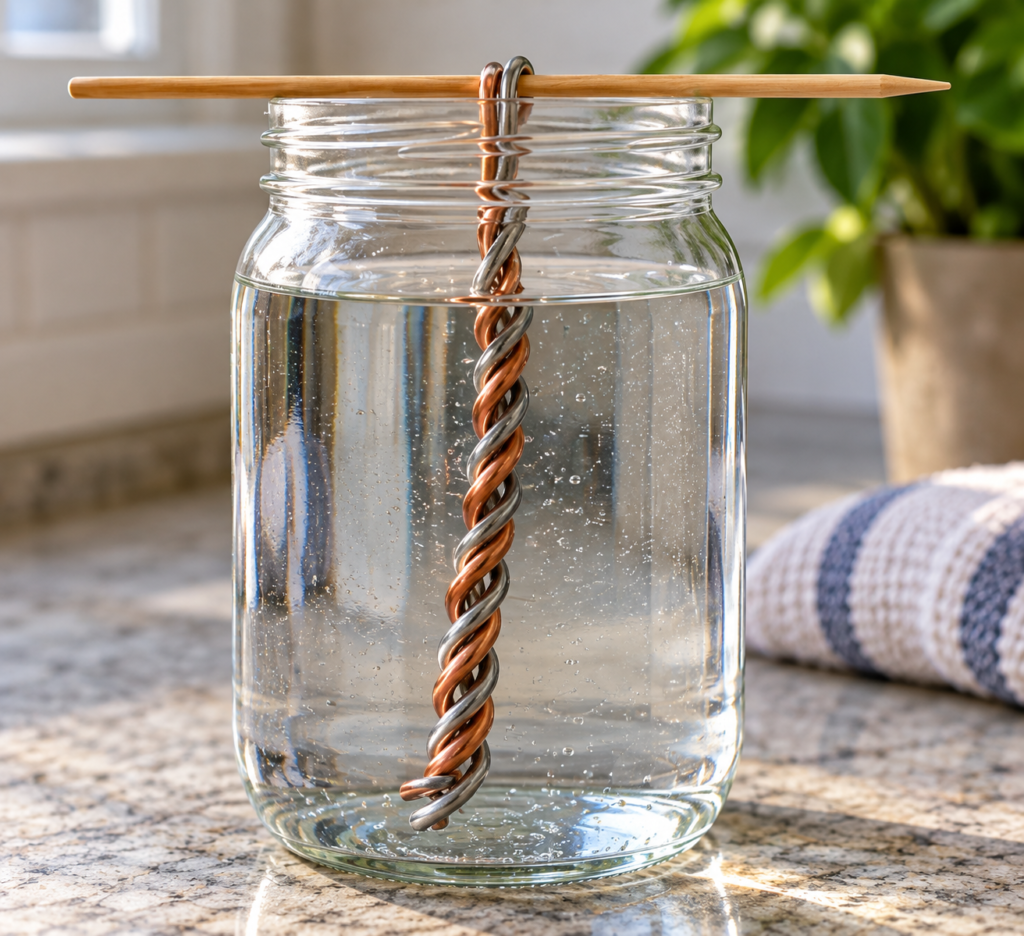
This is the step people get wrong, and it is the one that decides whether anything happens at all. The copper and the zinc must be in firm, direct, metal-to-metal contact. Not near each other. Not floating in the same jar. Touching, and ideally wound tightly together so they cannot drift apart. If the two metals are not connected, the electrons have no bridge, and the galvanic cell simply does not run.
- Cut to similar lengths. Trim the copper wire and the zinc strip or wire to roughly matching lengths for the container you are treating.
- Twist them together firmly. Wind the copper and zinc around each other so there is tight, direct metal-to-metal contact along their length. Think of braiding two strands, not laying two sticks side by side.
- Keep the shape open. Leave the twisted pair loose and airy rather than crushing it into a dense ball, so water can flow around every surface.
- Drop it in the water. Place the connected pair into your clean container so both metals are fully submerged.
- Give it time. Let it sit for the contact time in the next steps before moving on to filtration or storage.
Surface area is the other half of the equation. More exposed copper and zinc means more reaction sites and faster action. A loose coil of copper wound with a loose strip of zinc lets water reach the whole surface. A tightly packed lump hides most of the metal from the water and works far less effectively. Loose contact between the two metals, generous exposure to the water: that is the sweet spot.
The one rule that matters most: Copper and zinc do nothing useful sitting apart. Wind them together so they touch firmly along their length, then keep the twisted pair loose so water can flow around it.
Step 8: Figure Out How Much Copper and Zinc You Need Per Gallon
There is no lab-exact dose here, and anyone who gives you one to the millimeter is guessing. What actually drives the reaction is surface area plus time. More metal surface in contact with the water speeds things up. Less metal still works, it just asks for a longer soak. So think in comfortable starting amounts, then adjust.
A practical rule of thumb for a single gallon is about a 12-inch length of bare copper wire wound together with a similar length or strip of pure zinc. That gives a healthy amount of reactive surface for a gallon jug or pitcher treated overnight. Scale it with your container:
| Water volume | Rough starting amount of each metal | Notes |
| About 1 quart or 1 liter | A 6-inch twisted pair | Good for a canteen or water bottle |
| About 1 gallon | About 12 inches of each, wound together | A solid all-purpose starting point |
| About 5 gallons | 12 to 18 inches of each, or two to three pairs | A bucket needs more surface, spread it out |
| Large tanks or cisterns | Several pairs or a KDF granule column | Continuous antimicrobial layer, not a one-time dose |
On the ratio of the two metals, keep it simple: roughly equal amounts of copper and zinc works fine for a home build. If you want to fine-tune, lean toward a little more copper than zinc, which is closer to how commercial copper-zinc media and copper-zinc wire systems are set up. Zinc is the metal that sacrifices itself, so a slightly heavier zinc strip will also last longer before it needs replacing.
Two honest reminders about scale. First, adding more metal makes the reaction faster and stronger, but it does not turn copper-zinc into a parasite killer or a sediment filter. You cannot dose your way past its limits. Second, a bigger container is not just more water, it is more surface for algae and bacteria, which is exactly why tanks and cisterns want several pairs or a granule column rather than one lonely twist of wire.
Step 9: Allow Enough Treatment Time for Temperature and Chemistry
Copper-zinc treatment is not instant. Chlorine reduction can happen fairly quickly, but antimicrobial action and metal interaction need hours. A practical contact-time framework:
- At least 4 hours: a bare minimum treatment period.
- About 8 hours: a more useful general target.
- Overnight, up to 16 hours: the preferred approach for cold or questionable water.
Temperature changes the pace. Warm water speeds up ion movement, and cold water slows the whole system down. In cold conditions, plan on the longer end, closer to 12 to 16 hours than a quick 8-hour wait.
Water chemistry matters too. Most natural water falls between pH 6.5 and 8.5, which suits the reaction well. Very acidic water below pH 5 can dissolve zinc too fast, and highly alkaline water above pH 9 slows things down. If a source is unusual, especially near mining or known pollution, a simple pH test can help. Just remember a normal pH reading does not prove the water is safe.
Step 10: Pair It With Filtration for a Multi-Stage System
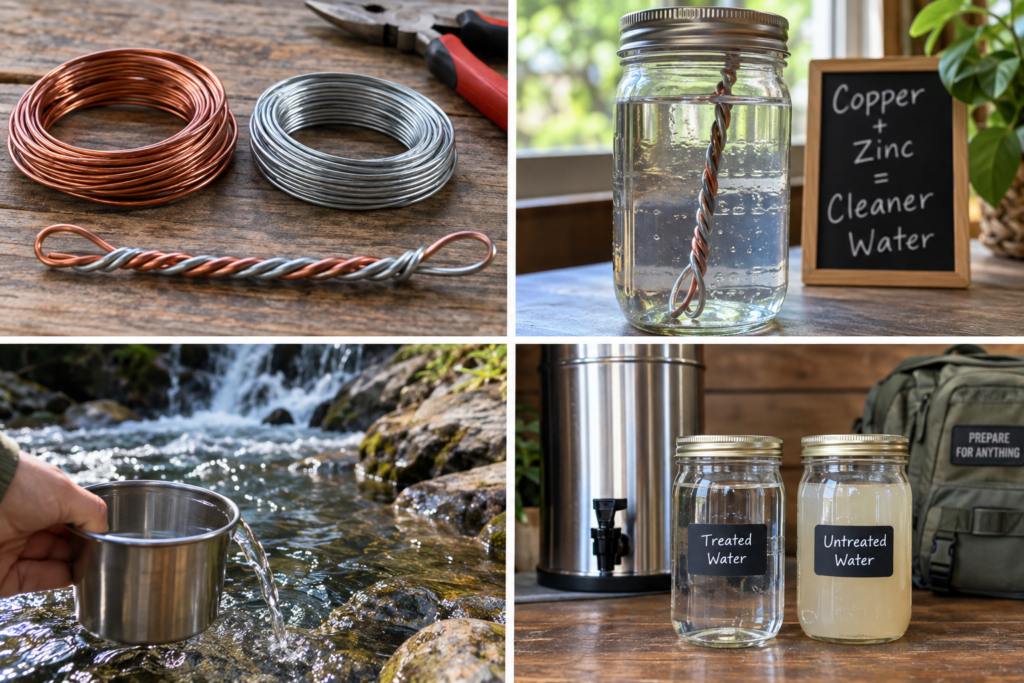
Copper-zinc shines as one stage in a sequence, not as the whole show. This is the part the shortcut videos gloss over: the metals go hand in hand with filtration, because each stage covers a gap the others leave open. Line them up so every category of contamination meets the tool built for it.
- Stage 1, cloth prefiltration. For murky creek water, pond water, or stored rainwater, first pour it through tightly woven cloth, a bandana, or a clean T-shirt. This pulls out large debris and some sediment. It does not make water potable, but it keeps later layers from clogging.
- Stage 2, copper-zinc galvanic treatment. Place your connected copper-zinc pair in the prefiltered water and give it the contact time above, ideally overnight for cold or uncertain water.
- Stage 3, natural hardwood charcoal. Use natural hardwood charcoal, not briquettes, which can carry additives. Crush it small, place it in a clean container with a small drainage opening, and pour the treated water through. This helps with residual taste and some organic chemicals and pesticides the metals do not touch.
- Stage 4, diatomaceous earth for fine particles. This powder of fossilized microscopic algae can physically trap very small particles when built into a filter layer, which is why it is relevant for cysts like Giardia and Cryptosporidium that galvanic action cannot reliably handle.
Physical filter performance depends on how well it is built, how the water flows, and whether the filter layer stays intact. For water with any known parasite risk, boiling remains the most dependable backup in this kind of system. When in doubt, boil.
Step 11: Maintain the Metals and Replace Zinc as It Wears Away
Zinc is the sacrificial metal. It slowly dissolves as it releases electrons, so it will not last forever, and that is by design, not a defect.
- Rinse and dry after each batch. Remove the pair, rinse it, and let it dry before storage.
- Inspect the zinc regularly. Replace it once it becomes visibly thin. This is where your spare strips earn their keep.
- Scrub off the white film. A white powdery layer on the zinc is zinc oxide. Gently scrubbing it with a brush or sandpaper exposes fresh zinc and restores reactivity.
- Watch the copper patina. Copper may darken or turn slightly green. A light patina is fine, but if buildup gets thick enough to flake into the water, lightly scrub the copper before reuse.
A slight metallic taste can show up after treatment. Running the water through a charcoal layer smooths it out.
Step 12: Use KDF Media for Larger or Permanent Systems
For a more permanent gravity-fed setup, copper-zinc granules sold as KDF media give you far more surface area than a single twisted pair. The basic concept is to pack the media into a pipe or housing with screens at both ends and let water flow through the granules, using the same galvanic principle at a larger scale.
For rain barrels, cisterns, and storage tanks, several copper-zinc pairs or a properly sized bed of media can act as a continuous antimicrobial layer. Check zinc thickness every few months, and never forget that stored water still needs a complete treatment plan before anyone drinks it.
Step 13: Avoid the Most Dangerous Copper-Zinc Mistakes
A simple build still leaves room for serious error. Steer clear of these:
- Assuming it purifies any water: copper and zinc have real gaps, especially parasites, sediment, and some chemicals.
- Failing to connect the metals: if the copper and zinc are not touching, wound together, the cell does not run at all.
- Using galvanized steel: choose pure zinc, not zinc-coated iron.
- Using insulated wire: bare metal has to reach the water.
- Drinking high-risk water without boiling: parasites can survive galvanic treatment.
- Ignoring cloudy water: dead microorganisms and debris stay put unless you physically filter them out.
- Relying on one method: water safety has no margin for error, so redundancy is the whole point.
A gravity filter can carry routine treatment, a portable UV tool gives you a field option, and copper-zinc media can hold down a continuous antibacterial storage layer. No single method should be trusted to cover every scenario on its own.
Step 14: Build Redundancy Into Your Drinking Water Plan
Come back to that first image: two cheap metals, twisted together, quietly working in a jar. It is a genuinely useful, low-power, reusable tool. It can reduce chlorine, add antimicrobial activity, help with some dissolved metals, and keep stored water in better shape when you maintain it.
Its limits are just as clear. It does not replace sediment filtration, organic chemical reduction, or dependable parasite control. If your water might carry Giardia, Cryptosporidium, sewage, or animal waste, reach for boiling or a real physical filter instead of trusting the metals alone. The strongest off-grid water system is layered: remove debris, treat with the right methods, filter where needed, and keep a proven backup on the shelf. Copper and zinc can absolutely be part of that plan. Just never the only line of defense.
Frequently Asked Questions About Copper and Zinc Water Purification
Do the copper and zinc really have to be touching?
Yes, and this is the make-or-break detail. The galvanic cell only runs when the two bare metals are in firm, direct contact, ideally wound or twisted together. If they simply float in the same container without touching, the electrons have no path between them and the reaction does not work the way it should.
How much copper and zinc do I need per gallon?
A good starting point for one gallon is about a 12-inch length of bare copper wire wound together with a similar length of pure zinc, soaked overnight. Use roughly a 6-inch pair for a quart, and 12 to 18 inches of each, or a few pairs, for a 5-gallon bucket. More surface area works faster, and less metal just needs more time.
What should I buy, and about what does it cost?
Buy bare solid copper wire, sold at hardware stores as bare copper grounding wire in 12 or 14 gauge, usually about a quarter to forty cents per foot. Then buy pure zinc, sold online as a zinc anode or electrode at 99.9 percent purity or higher, often ten to twenty dollars for a pack of strips or a few dollars per foot as ribbon. A full starter build typically runs about fifteen to twenty-five dollars.
Can copper and zinc make any water safe to drink?
No. Copper-zinc treatment does not reliably remove parasites, sediment, pesticides, or every chemical contaminant. Unknown or high-risk water needs multiple treatment stages, and boiling matters wherever parasite contamination is possible.
How long should copper and zinc stay in water?
Allow at least four hours, with around eight hours as a better general target. Cold water slows the reaction, so 12 to 16 hours may be more appropriate in winter.
Can I use galvanized steel instead of a pure zinc strip?
No. Galvanized steel is iron under a thin zinc coating. As the coating wears down, the iron can corrode. Use pure zinc strips, rods, ribbon, or purpose-made copper-zinc media instead.
Does copper-zinc treatment remove chlorine?
The reaction can reduce free chlorine by converting it into chloride, which cuts the taste and smell of chlorinated municipal water.
Why does the zinc strip need replacement?
Zinc is the sacrificial metal in the pair. It gradually dissolves as it releases electrons, so it thins out with use and eventually needs replacing. Keeping a spare strip on hand makes that a two-minute swap.