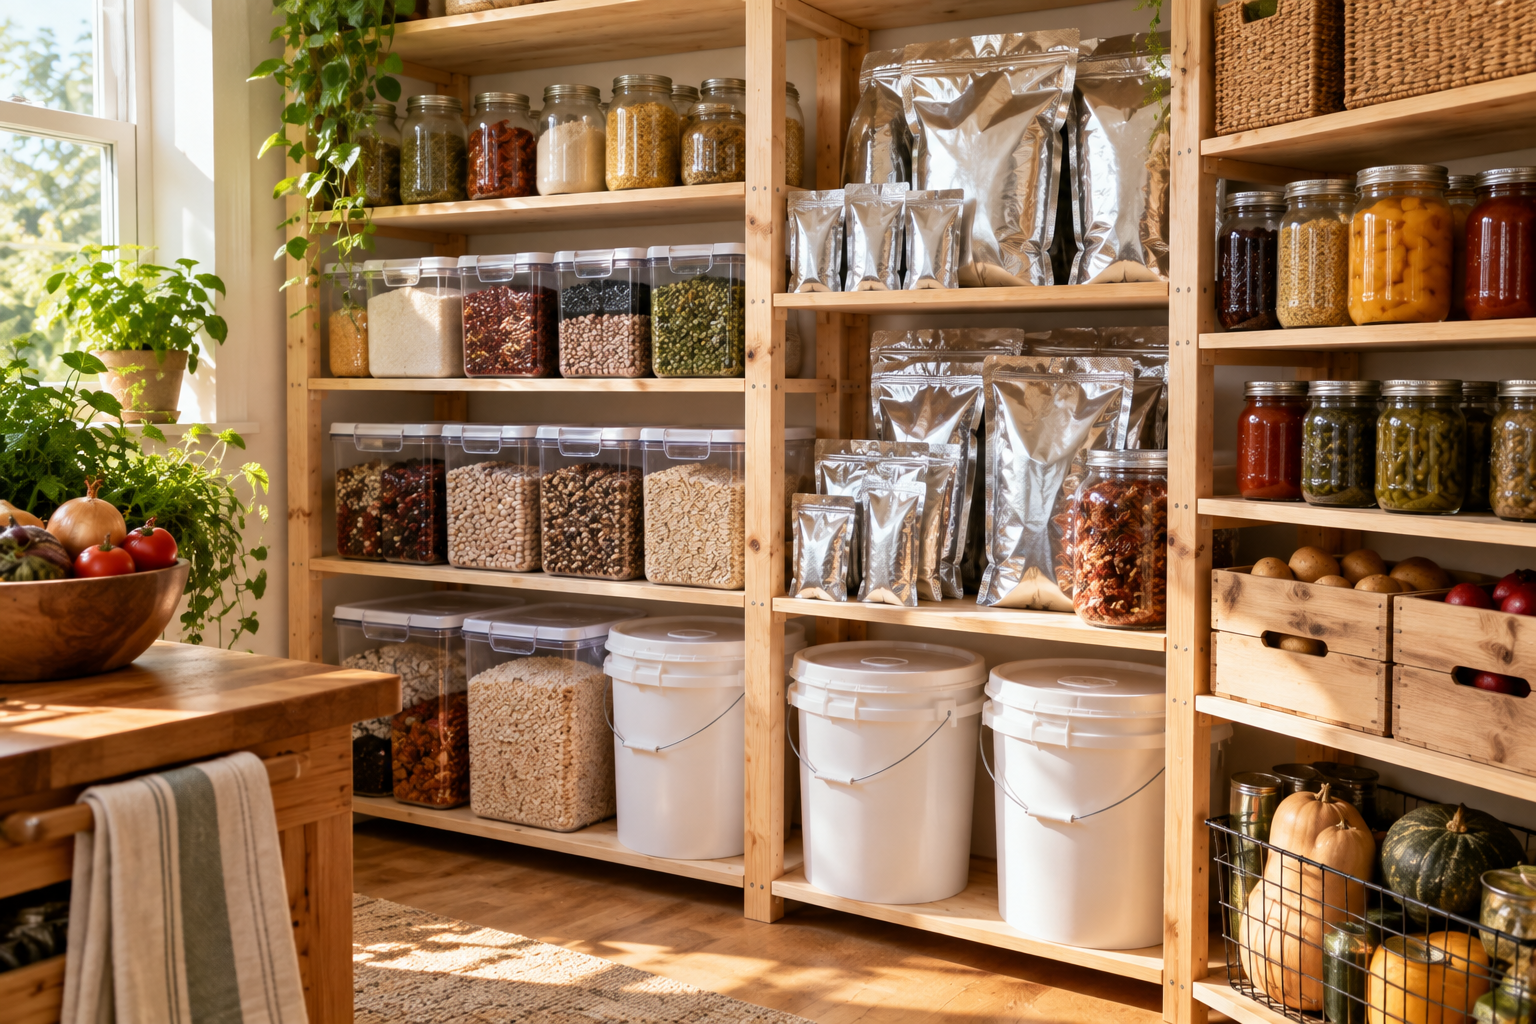
Prepping isn’t about alarm. It’s about opening the pantry during a storm and knowing you are fine. A good long-term food storage system is quieter than it sounds: a handful of staples, smart packaging, and a rotation you actually keep up with. This guide walks you through designing, building, and maintaining one that fits your household and your budget. If you want a pantry you can trust without overspending, this is where to start.
Here is what we will cover:
- Set your days-to-cover target and map your real space
- Build a simple zoned layout that makes rotation painless
- Stock the core staples and pack them to last
- Keep a lean rotation and inventory system that sticks
- Control moisture and pests, and shop deals without overbuying
Let’s build it, one layer at a time.
1. Define Your Storage Goals and Space
A storage plan starts with a concrete commitment: how many days you want to cover, and what space you can actually use. Treat this as a capacity map, not a wishlist. The calls you make here drive everything downstream, how densely you pack, how fast you rotate, and how much you spend.
Three decisions carry the whole plan:
- Days to cover: pick 90, 180, or 365-plus days based on your risk tolerance and budget.
- Space and climate: measure usable volume, note the temperature and humidity, and plan for pests and easy access.
- Target inventory: sketch grains, proteins, fats, canned goods, and snacks with rough quantities per category.
- Budget rhythm: set a monthly restock number and time purchases to real deals, not impulse.
4 Steps To Size Your Plan:
- Set your days target. Decide how many days you want to cover, honestly, given your climate and shelving.
- Map your space. Measure usable shelving and note the temperature and humidity where it lives.
- Draft a category inventory. List grains, proteins, fats, canned goods, and snacks with approximate amounts.
- Set a monthly budget. Commit to a restock number you can keep every month without strain.
Here is what that looks like in practice: a family of four with 40 square feet of shelving in a dry basement aims for 180 days. They figure roughly 25 to 30 cubic feet of usable volume, plan on about 40 five-gallon buckets for grains and beans, and leave room for canned goods, oils, and the occasional bargain filler.
Key takeaway: Start from your actual space and budget, then translate your days-to-cover target into a concrete layout and a category inventory. Don’t chase days you can’t safely store.
2. Build a Zoned Storage Layout
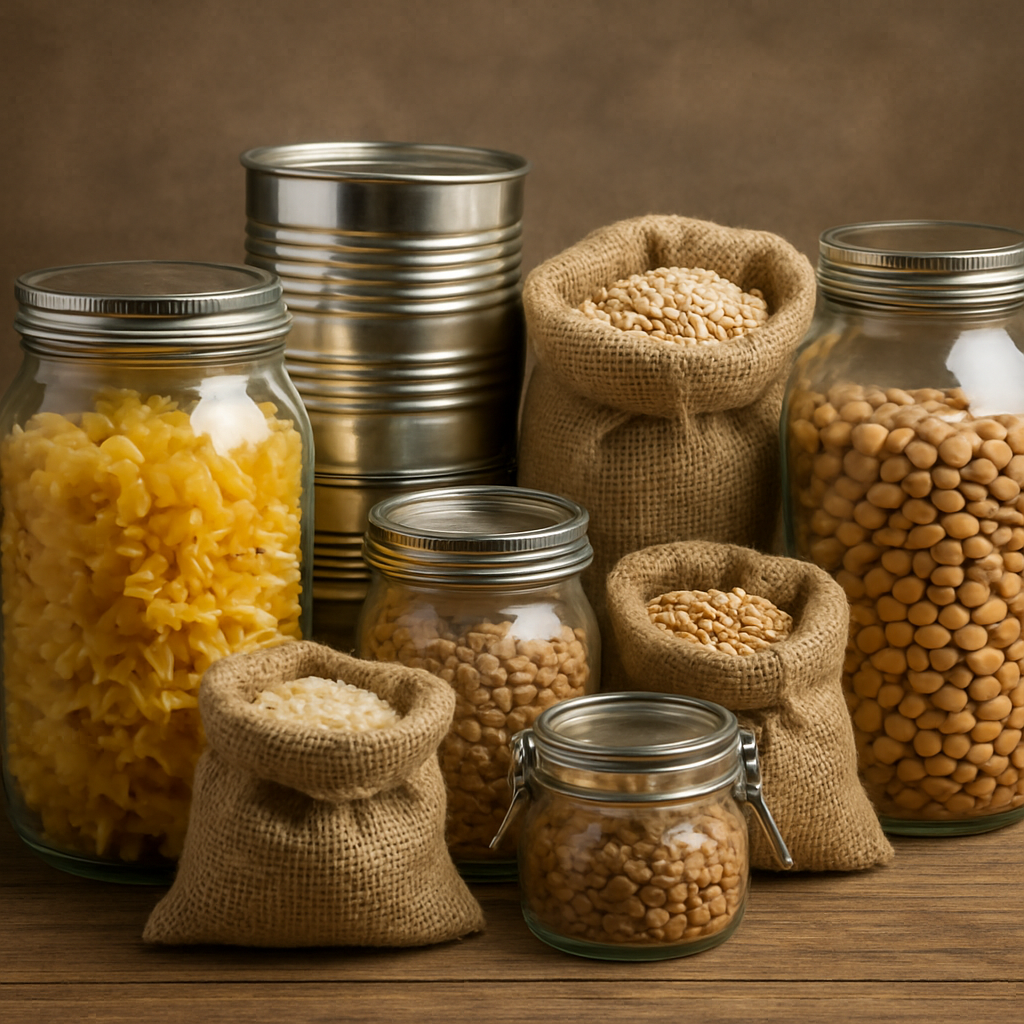
A good layout turns a closet into a working pantry, not a museum of perfectly stacked boxes. The lever is simple: group by use, store bulk in durable containers, and keep near-term items close to where you cook. The less you have to hunt, the more likely you are to actually rotate.
Frame the space in three zones you can grow into:
- Zone A: closest to the prep area, for day-to-day staples within a couple steps of the kitchen.
- Zone B: bulk staples in larger containers or 5-gallon buckets, in a dedicated bulk area.
- Zone C: a cooler, darker reserve for the longest-term items.
- Vertical and visible: use tall shelving, avoid deep corners, and label everything so a grab isn’t a scavenger hunt.
- Sealed and dry: keep lids tight and moisture out, because a small leak compounds over time.
4 Steps To Set Up Your Zones:
- Place Zone A. Put daily-use items on anchored shelves near the kitchen.
- Stack Zone B. Store bulk grains and beans in clear bins and buckets in the bulk area.
- Reserve Zone C. Move freeze-dried meals and long-term items to the cool, dark corner.
- Label and log. Date-code every bag and bucket, and start a simple FIFO list you can audit monthly.
In a 12 by 8 foot basement pantry, you might carve three zones along two walls: canned goods on anchored shelves in Zone A, bulk grains and Mylar-bagged staples in Zone B, and freeze-dried meals with moisture absorbers on a separate rack in Zone C. Search time drops and inventory stays visible at a glance.
Key takeaway: Start with a modular, zone-based layout you can scale. The quickest wins come from a simple zone map, a handful of sturdy containers, and a clear rotation process.
3. Stock the Core Staples
The core staples are the backbone of the whole plan. Anchor your pantry to a handful of well-proven ones and you cut last-minute shopping during disruptions and keep rotation simple. The food-safety rule is steady across sources: store dry goods cool and dark, in packaging that keeps oxygen out. The USDA and the National Center for Home Food Preservation are the references worth checking for specifics.
Spread your supply across formats so a gap in one method doesn’t sink you:
- Dried grains and legumes: rice, pinto beans, lentils, quinoa; store in Mylar bags or sealed containers, and move to gamma-seal buckets for bulk. Label and keep cool and dark.
- Canned goods and shelf-stable proteins: canned vegetables and meats, plus freeze-dried meal pouches; choose intact seals, store away from heat, and rotate FIFO.
- Powdered dairy and essentials: powdered milk, evaporated milk, sugar, salt, and bouillon; repackage into airtight containers after opening to keep them usable.
- Oils and fats: vegetable oil and coconut oil; store cool and dark, watch for rancidity, and rotate like everything else.
One compact basement setup held roughly 60 pounds of rice and 40 pounds of dried lentils in Mylar bags with oxygen absorbers, tucked inside 5-gallon buckets, with canned goods on a separate shelf. Rotated quarterly and refreshed with targeted bargains, that baseline stayed functional for a full year.
Key takeaway: Use a layered packaging strategy: Mylar bags with absorbers for dry staples, cans for convenience, and buckets for bulk, paired with simple FIFO rotation and a stable climate.
4. Packaging and Preservation Methods
Packaging is the bottleneck that decides how long food stays good. The job is always the same: keep moisture and oxygen out, keep pests away, and use space well. Match the method to the food, and don’t force everything into one system.
- Vacuum sealing: best for meal-sized portions and moisture-stable staples you rotate often. Seals can fail over time, and fine powders shift or crush, so reserve it for what you’ll cycle through.
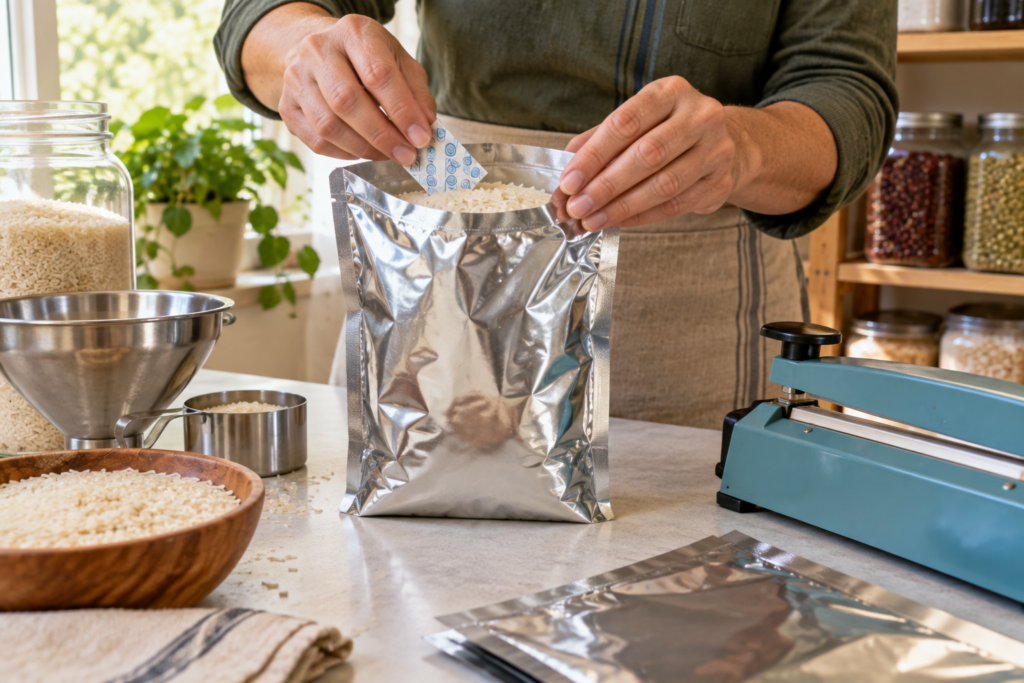
- Mylar bags with oxygen absorbers: a near-airtight barrier for dry goods that scales cheaply. You’ll need a heat sealer and absorbers sized to the bag, and you have to guard against punctures and static.
- Five-gallon buckets with Gamma Seal lids: cheap, moisture-resilient bulk storage, ideal around pre-packed Mylar. They’re heavy to move, so use desiccants and clear labels to keep rotation sane.
- Dehydration and freeze-drying: push shelf life the furthest. Dehydration suits everyday produce and snacks; freeze-drying gives the longest life at the lightest weight, but it costs more and needs reliable power.
In a two-person apartment, 40 pounds of rice can ride in Mylar bags with 2,000 to 3,000 cc oxygen absorbers inside a gamma-seal bucket, five gallons of beans sit sealed with desiccant packs, and a compact Foodsaver handles the weekly meals. Rotation stays simple, and you never surrender a whole closet to it.
Here is what I would do: pick one primary method per category, then validate it with a 60 to 90 day rotation test before you expand.
Key takeaway: Use a layered packaging approach: Mylar plus absorbers for dry staples, gamma-seal buckets for bulk access, and vacuum sealing for meals. Longevity and easy rotation, together.
5. Rotation and Inventory That Stays Simple
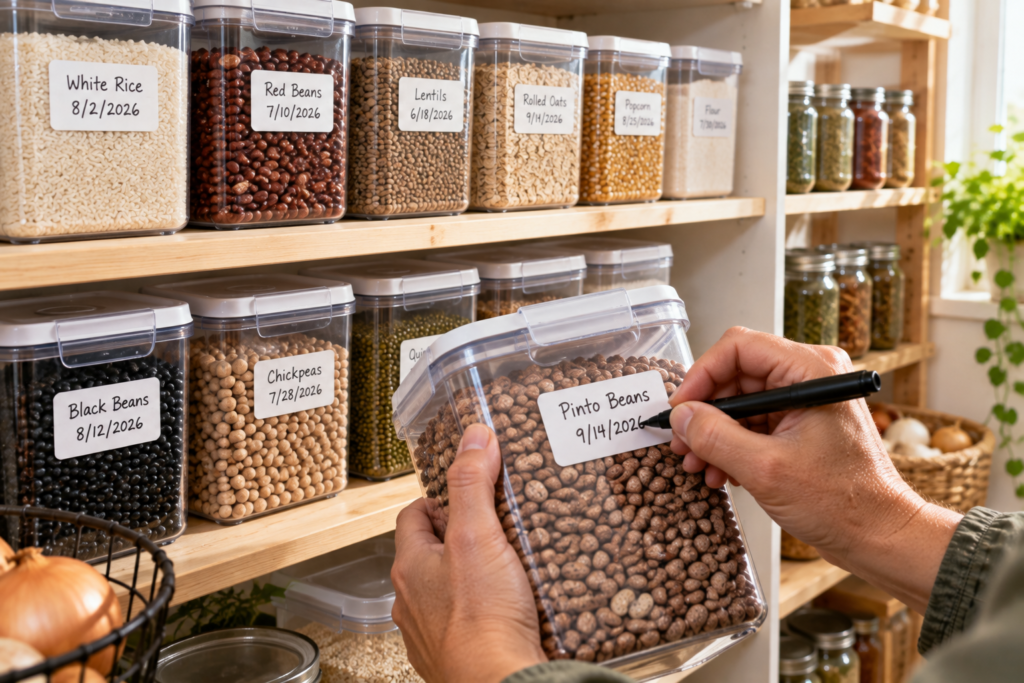
Rotation and tracking are the quiet backbone of a reliable pantry. Skip them and you drift toward waste, misplaced items, and expired staples. The fix is FIFO thinking: oldest to the front, a date on everything, and a log light enough that you’ll actually keep it.
- Rotation zones: a front stock for what you’ll use soon, a back stock for bulk and less-frequent staples.
- Consistent labels: date purchased and best-by on every item, with an optional color code by category.
- A simple stock log: item, date, quantity, and expiration in one notebook or a light app like Sortly.
- Reminders and audits: a quick weekly glance and a fuller quarterly count to catch drift early.
- A paper backup: a printed shelf map or pocket notebook, so a power gap or sync issue doesn’t derail you.
3 Steps To a Rotation You’ll Keep:
- Pull oldest forward. Each week, move the oldest dates from back stock to the front.
- Check the log. Cross-check your list against what’s actually on the shelf.
- Flag the gaps. Note anything running low for your next bargain run.
Key takeaway: A simple, disciplined rotation plus a minimal log beats a complex system you abandon after two weeks. Consistency is the whole game.
6. Safety, Pest Control, and Maintenance
Safety and maintenance are the quiet multipliers of your plan, and moisture and pests are the two risks most people underestimate until it’s too late. Keep the space cool and dry: aim for below 70 degrees where you can, hold relative humidity under 50 percent for grains and powders, and run a dehumidifier in damp rooms. Elevate shelving off concrete and away from walls to cut condensation.
- Seal entry points: caulk gaps around shelves, seal door frames, and add door sweeps to block pests.
- Use pest-resistant containers: metal or heavy-duty plastic with tight seals, and gamma-seal buckets for bulk staples.
- Layer your packaging: store dry goods in Mylar with absorbers, then place them inside a secondary container.
- Use desiccants well: silica gel packs in bins with dry goods, but never inside sealed cans.
- Keep it clean: wipe shelves, fix moisture sources promptly, and keep floors dry.
3 Steps To a Maintenance Cadence:
- Check humidity monthly. Confirm the space is staying cool and dry, and adjust if it isn’t.
- Audit shelves quarterly. Inspect cans for dents or bulges, jars for cracks, and pouches for tears; retire and sanitize around anything damaged.
- Refresh pest control yearly. Renew seals and controls, and log the date, item, condition, and action taken.
One family in a humid basement moved staples into a climate-controlled closet, switched to gamma-seal storage, and added a compact dehumidifier. Eight months later, no moisture damage, no pest signs, and steadier rotation habits.
Key takeaway: Pest control and moisture management determine shelf life more than packaging choices. Treat them as an ongoing guardrail, not a one-off fix.
7. Budgeting, Deals, and Smart Sourcing
Budgeting for long-term storage starts with how you actually eat, not a heroic spending cap. Map your monthly use by category, then set a restock cadence around real promotions. Compare deals with price-per-serving math instead of brand loyalty, and cap each category at a realistic quarterly spend. Bargains are force multipliers, not permission to overbuy, and if you can’t rotate it fast, favor smaller, more frequent restocks over bulk that lingers.
A few tactics stretch every dollar:
- Stack coupons and bundles: on trusted brands like Mountain House, Augason Farms, and PackFreshUSA to lift per-serving value.
- Time seasonal sales: line restocks up with high-use staples when price dips are deepest.
- Buy bulk selectively: rice, beans, and powders when space allows, then repack into standard containers.
- Measure price per serving: compare formats on real value, not the sticker or the brand name.
- Mix formats by space: balance premium freeze-dried with cost-effective canned and dried, based on rotation and footprint.
One small family tracked a six-month promo window on Mountain House entrees, bought several varieties on sale, and repackaged portions into labeled, shelf-friendly packets with a Foodsaver. More meal variety, lower cost per meal, and a tidy inventory.
Key takeaway: Align restock planning with promotions to maximize value without sacrificing space or rotation discipline. Build a quarterly bargain calendar and run a small test restock this month.
8. Quick-Start Playbooks by Household
Tailoring the plan to your household is what makes it actually happen. It fights the two common failure modes: overbuilding for storms you may never see, and underpreparing because space feels tight. Start from your real constraints, then scale. Pick the archetype closest to you and grow from there.
- Single adult, compact space: lean on density and shelf-stable staples, a small vacuum sealer, and maybe a lightweight dehydrator for variety without hogging space.
- Small family, urban home: expand with bulk staples and a layout that supports weekly rotation, adding a modest dehydrator or small chest freezer if space and budget allow.
- Multi-generational or off-grid: commit a dedicated storage zone, larger containers, and a fully documented inventory to keep counts and spoilage in check.
A city family of four might organize around a 90-day core of rice, beans, canned vegetables, and powdered milk, track it on a single sheet, rotate weekly, and refresh on quarterly bargain hunts. Start lean with one preservation method per archetype, then scale as time, space, and money allow.
Key takeaway: Start with your tightest constraint, space, budget, or time, and design a compact playbook you can scale later without ripping up the system.
Final Thoughts
Come back to that image: opening the pantry mid-storm and feeling calm instead of caught off guard. That feeling isn’t built in one big shopping trip. It’s a days target, a zone map, a few good containers, and a rotation you keep up. Draft a one-page plan for your household this week, run a one-month test, and adjust from what you learn. That is how long-term food storage stops being a project and becomes peace of mind.