A complete kit does little good if departure stalls at the front door.
A cat vanishes under the bed when an evacuation alert sounds. Its carrier is in the garage, the food is packed, and the nearest shelter does not accept animals. None of those problems is easy to solve while leaving.
Rehearse the departure, not just the packing: secure the pet, carry the supplies, and load the actual vehicle. Keep the carrier accessible and practice using it when the animal is calm. Confirm a pet-friendly destination and a backup before they are needed. Food, water, and medication should cover the journey and any delay before supplies can be replaced.
What leaves with the pet
-
Food, water, and feeding
Pack at least three days of familiar food and enough drinking water for the pet’s usual needs, with extra for hot weather. Add lightweight bowls, a scoop, and a manual can opener if needed. Check expiration dates when rotating the kit.
-
Health supplies
Keep medications in labeled containers, alongside dosing instructions and copies of vaccination records. Include any essential care supplies, such as a glucose meter, and ask the veterinarian how to maintain a reserve of prescription medication.
-
Identification
Check that collar tags show a working phone number and that microchip registration is current. Carry a recent photo showing the pet’s markings and a copy of its records in a waterproof sleeve or available offline.
-
Restraint and transport
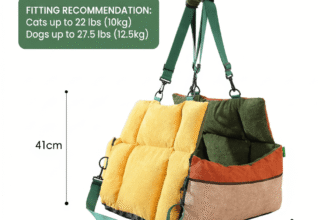
Set aside a secure, ventilated carrier sized for the pet to stand and turn around, plus a fitted harness or collar and a sturdy leash. Label the carrier with the pet’s name and an owner contact number.
-
Sanitation
Add waste bags or a small litter setup, absorbent pads, wipes, and sealable bags for soiled items. Keep these accessible without unpacking the food.
-
Comfort
Include a familiar blanket or washable toy. Its scent can help a pet settle in an unfamiliar vehicle or temporary shelter.
Bulk food, extra litter, and spare bedding can remain at home for sheltering in place. The portable kit must contain everything the pet needs immediately after departure; an evacuation may leave no chance to retrieve larger supplies.
Food and water for the road
Three days is a planning starting point, not a universal ration. Pack the amount the pet normally eats over that period, then allow for travel delays or difficulty replacing a prescription diet. Keep food in its original packaging when practical, or label portions with the pet’s name, food, amount per meal, and feeding times. Include a can opener if the usual food requires one.
Set aside drinking water plus water for basic cleanup—rinsing a bowl or cleaning a soiled carrier, for example. The amount needed depends on the pet, weather, journey, and access to safe water along the route. A collapsible bowl helps make the supply usable during stops, but it does not replace carrying the water itself.
An evacuation is a poor time to test an unfamiliar food. A sudden diet change can cause vomiting or diarrhea when travel is already stressful and veterinary care may be hard to reach. Rotate stored food before it expires so the emergency supply stays familiar.
Medication and first aid
Daily medication is separate from first-aid supplies. Each prescription should travel in its labeled container with written directions showing the pet’s name, dose, timing, and storage requirements. Keep the prescribing veterinarian’s number and an after-hours clinic contact with those instructions, including on paper in case a phone loses power.
Before a forecast storm, count the doses on hand and ask the veterinary practice about a refill while it can still access records and a pharmacy. The steps for arranging an emergency refill are worth checking before roads or clinics close. A missed dose, lost bottle, or change in symptoms calls for veterinary advice—not a guessed dose or a substitute medicine.
A first-aid pouch serves a different purpose: basic supplies such as gauze, nonstick dressings, saline for rinsing, and gloves can help protect a minor wound while veterinary care is arranged. Open any purchased kit before packing it. Check contents against the pet’s needs, replace missing or expired supplies, and make sure the person carrying it knows what each item is for.
Human pain relievers and leftover prescriptions can harm pets. Do not start a medication, change a dose, or give an unfamiliar first-aid product without veterinary direction.

Identification and records that travel
A pet’s collar should carry an engraved phone number that a finder can read without an app or cell service. Check that the collar fits and the number is current. Confirm the microchip number and contact details with the chip registry, including a backup contact if the registry allows one. A microchip offers another way to identify a pet, but it requires a scanner and a way to look up the registration; it cannot replace a visible tag.
Keep a recent, clear photo showing the pet’s face and distinctive markings. Pack paper copies of vaccination records, current medications, and relevant medical history in a waterproof sleeve; save copies on a phone so they can be opened offline, not just from cloud storage. Add the veterinarian’s contact details and the pet’s microchip number to both sets. Shelters, boarding facilities, and temporary lodging may ask for vaccination or treatment records before accepting a pet, particularly when animals will be housed close together.

Choose a carrier that stays closed and fits the trip
-
Closures
Latch every door, then gently pull it to check for movement. Inspect zippers, seams, and fasteners for gaps an animal could push open.
CheckA door that remains latched under gentle pressureAvoidLoose latches or zippers that separate -
Airflow
Ventilation must remain open after the carrier is packed into the vehicle, not just while it sits on the floor.
CheckUnobstructed vents on more than one sideAvoidLuggage or blankets pressed against vents -
Animal fit
The pet should be able to stand, turn around, and lie down naturally. Check that bedding does not crowd the usable space.
CheckRoom to change positionAvoidA cramped carrier chosen solely for vehicle fit -
Vehicle placement
Test that the loaded carrier passes through the vehicle opening and sits securely away from front airbags. Follow the vehicle and carrier makers’ restraint instructions; a carry handle is not automatically an anchor point.
CheckA stable position with approved restraintAvoidAn unsecured carrier or improvised tie-down
Even cats that normally get along can panic or fight when confined during evacuation. Separate carriers give each cat space and allow one to be handled without risking the other’s escape.
Rehearse the trip from pet to vehicle
-
Find each pet
Start where each animal actually hides or rests. Check whether a frightened pet could reach an inaccessible space, and decide how to close off that space before an alert.
-
Fit identification and restraint
Check that tags are attached, then put on the collar or harness and attach the leash. Confirm the fit while the animal is calm; evacuation is a poor time to discover a loose buckle.
-
Practice carrier entry
Leave a cat’s carrier accessible between drills so it becomes familiar. Rehearse getting the cat into the carrier without a chase, then check that the door latches securely.
-
Test the dog’s route
Walk the dog to the vehicle, including stairs and tight turns. For a large or mobility-limited dog, assess whether a rescue sling permits a safe lift with the people who would actually be present.
-
Load the kit and check the fit
Carry the departure kit and place the secured carrier or restrained dog in its intended vehicle position. Time the full run and resolve blocked exits, missing keys, or crowded cargo space afterward.
If a dog cannot be moved without straining a person or hurting the animal, do not count on an improvised lift. Arrange capable help and a workable route before evacuation becomes urgent.
Plan the trip beyond the driveway
A destination is not a plan until it will accept the pet. Confirm each shelter, hotel, or host directly: ask about species, size or number limits, vaccination records, fees, and where animals may stay. Keep a second destination and an alternate route in case roads close or the first stop becomes unavailable. Save addresses and phone numbers offline; a reservation or a pet-friendly label is no substitute for current confirmation.
Keep the pet contained at every stop
In the vehicle, a closed carrier or appropriate restraint should prevent a pet from reaching the driver or escaping when a door opens. Before anyone opens a car door, check that carrier latches are shut or attach the leash while the dog is still inside. At fuel and rest stops, choose a quiet spot away from traffic, offer water, and allow dogs a toilet break. Cats may need an enclosed, private place for a litter tray rather than a roadside release.
Temperature can change quickly in a parked vehicle. Never leave a pet unattended in one, even for a brief errand; arrange stops so someone can remain with the animal in a safely cooled or heated space. During the drive, watch for heavy panting, unusual lethargy, vomiting, or escalating distress. Stop safely and seek veterinary advice if those signs persist or appear severe.
On arrival, secure doors and windows before opening a carrier. Set out water, a toilet area or litter tray, and familiar bedding in a quiet space, then check the pet for injury or signs of heat stress. Keep the leash, carrier, medication, and records accessible until the animal is settled; unfamiliar surroundings are a poor time to unpack them into separate rooms.
Keep the kit ready for the next trip
Check the kit on a recurring schedule and immediately after use, replacing anything consumed, damaged, expired, or outgrown. Rotate food according to its packaging, including any shorter use-by period after opening, and account for heat or moisture where it is stored. For dogs, emergency food replacement guidance can help turn those dates into a workable routine.
The next action is to assemble the kit and time one complete departure with every pet.