Long-Term Food Storage: Best Practices for Preppers
September 25, 2026
3 Views
SaveSavedRemoved0
A good pantry looks boring until the power goes out. Then it’s the difference between a calm week and a scramble. Long-term food storage is the quiet backbone of preparedness, and it rewards a little planning more than a big budget. This guide shares a field-tested framework for a climate-smart pantry that rides out outages, storms, and supply hiccups. If you want stock you can trust for months, here is how to set it up right.
Here is what we will cover:
Set cool, dry storage conditions you can actually hold
Stock a diverse core of shelf-stable staples
Seal out oxygen and moisture with layered containers
Match preservation methods to your food and your power
Keep a lean inventory and a real outage plan
Let’s build the pantry.
Set a Climate-Smart Foundation
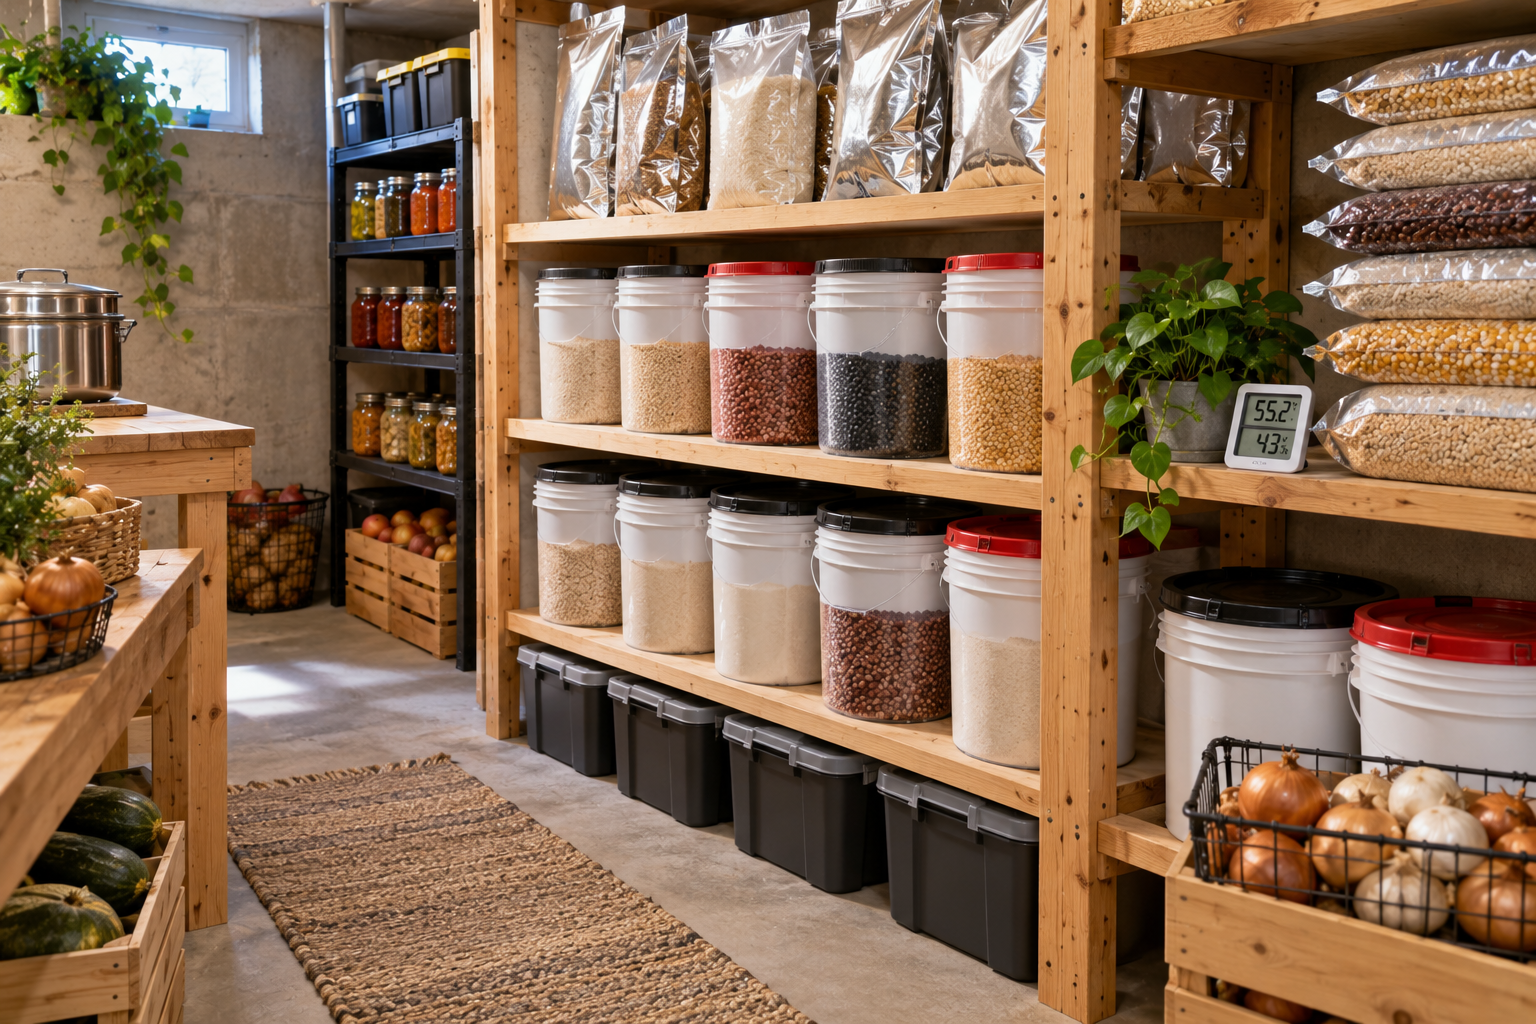
Long-term storage starts with the space itself. You want zones that stay cool and dark most of the year, because that slows moisture migration, mold, and fat going rancid. Aim for roughly 50 to 60°F (10 to 15°C) and humidity under 60 percent. If you can’t hold that year-round, lean on the coolest spots you have, deeper corners, insulated basements, stone walls, and shaded areas, then compensate with monitoring and a simple rotation plan.
A few moves keep the space honest:
Cool zones first: deeper corners, insulated basements, stone walls, and shaded areas.
Passive cooling: seal drafts, add insulation, and improve airflow before you reach for power.
Real monitoring: min-max thermometers and hygrometers in a few representative spots, with alerts for sharp swings.
Segmented storage: split your stock so a single failure doesn’t ruin everything.
3 Steps To Set Your Climate Baseline:
Find the coolest zones. Aim for 50 to 60°F and humidity under 60 percent, and prioritize the spots that hold it.
Add sensors. Place thermometers and hygrometers in a cool corner, a middle shelf, and the bulk-storage area.
Set a target and scale. Start at 2 to 3 months of stock, then grow the baseline as space and budget allow.
In a humid midwestern basement, one prepper set up a climate-smart shelf behind a water-heater closet: a small dehumidifier, a digital min-max thermometer near the wall, and a humidity sensor by the bulk bins. They store 70 pounds of dried beans in 5-gallon airtight buckets with gamma lids, each labeled with content and date, and when outdoor humidity climbs above 65 percent they boost airflow and pull older stock to the front.
Key takeaway: Cool and dry is the whole game. Aim for 50 to 60°F and humidity under 60 percent, monitor it, and segment storage so one failure never wipes you out.
Stock Shelf-Stable Staples
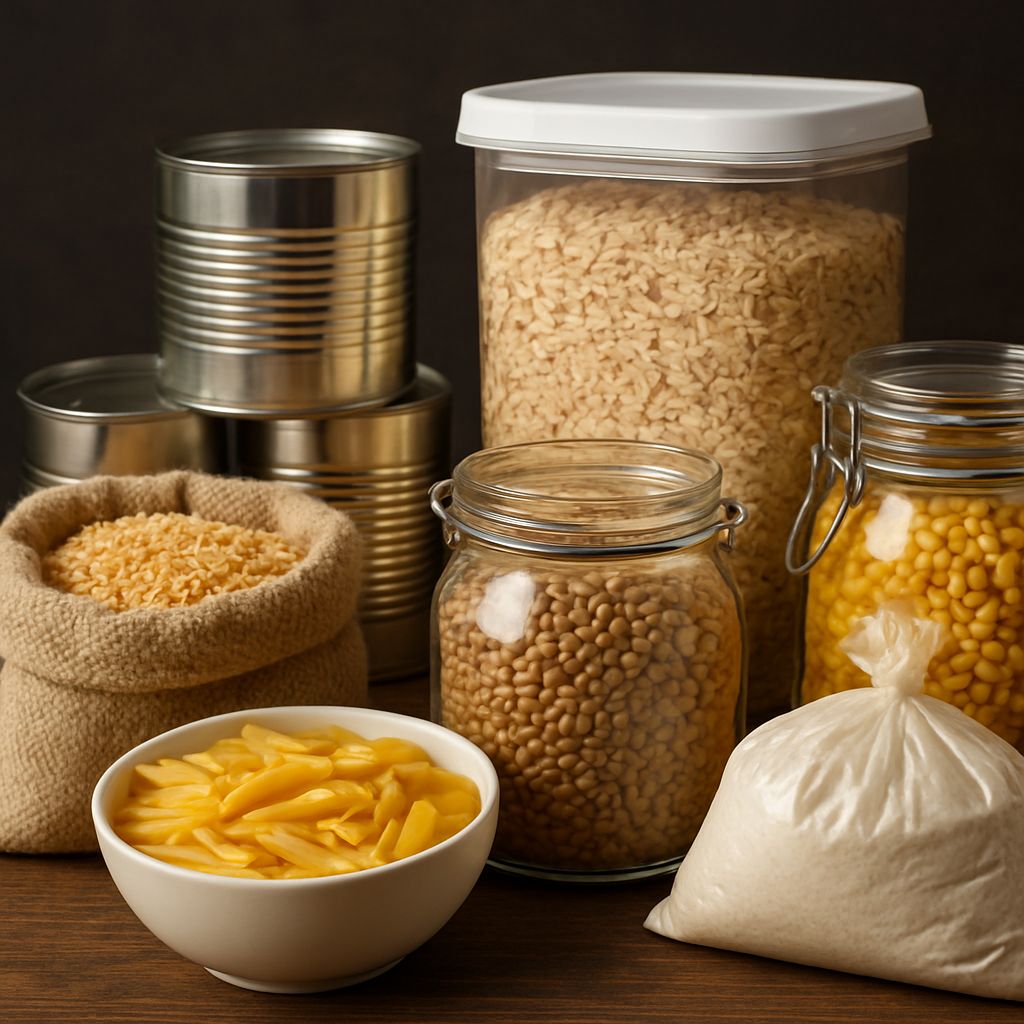
Shelf-stable staples are the backbone of a resilient pantry. Focus on a core set that delivers calories, protein, and fats with minimal fuss, keep it cool and dry, and tailor the setup to your climate instead of chasing perfect conditions. Ready.gov’s food storage guidelines are a solid baseline to adapt from.
Build across categories so no single gap leaves you short:
Grains and legumes: white rice, oats, barley, lentils, and dried beans.
Canned proteins: tuna, chicken, sardines, and beans for texture and nutrition.
Fats and oils: coconut oil, shelf-stable shortening, and powdered butter substitutes.
Dairy and alternatives: powdered milk, evaporated milk, and non-dairy creamers if you use them.
Canned fruits and vegetables: mixed vegetables, tomatoes, peaches, and fruit in juice.
Ready-to-eat meals and snacks: freeze-dried entrees, canned soups, and peanut butter.
In a winter outage, a family could lean on a core bundle of 20 to 25 pounds of white rice, 20 to 25 pounds of dried beans, a case of vegetables, several cans of fruit, powdered milk, and a few jars of cooking oil. That supports simple, one-pot meals for a week or two with no trips to the store. Store the bulk in gamma-lid buckets, pack dried foods in Mylar with oxygen absorbers, label everything, and keep a clear FIFO rotation.
Key takeaway: Build a diverse core of shelf-stable staples across categories, then run a simple FIFO rotation. Variety plus discipline keeps waste down and readiness up.
Containers, Packaging, and Oxygen Control
Containers won’t save your food if oxygen and moisture slip in. The fix is a layered system: glass jars for quick access, Mylar bags with oxygen absorbers for long-term dry goods, and airtight 5-gallon buckets for bulk. Use only food-grade materials, and never reuse a container that once held chemicals or fuel.
Match the container to the job:
Glass jars (Mason or Ball): best for small portions you access often; tight seal and a clear view of the contents.
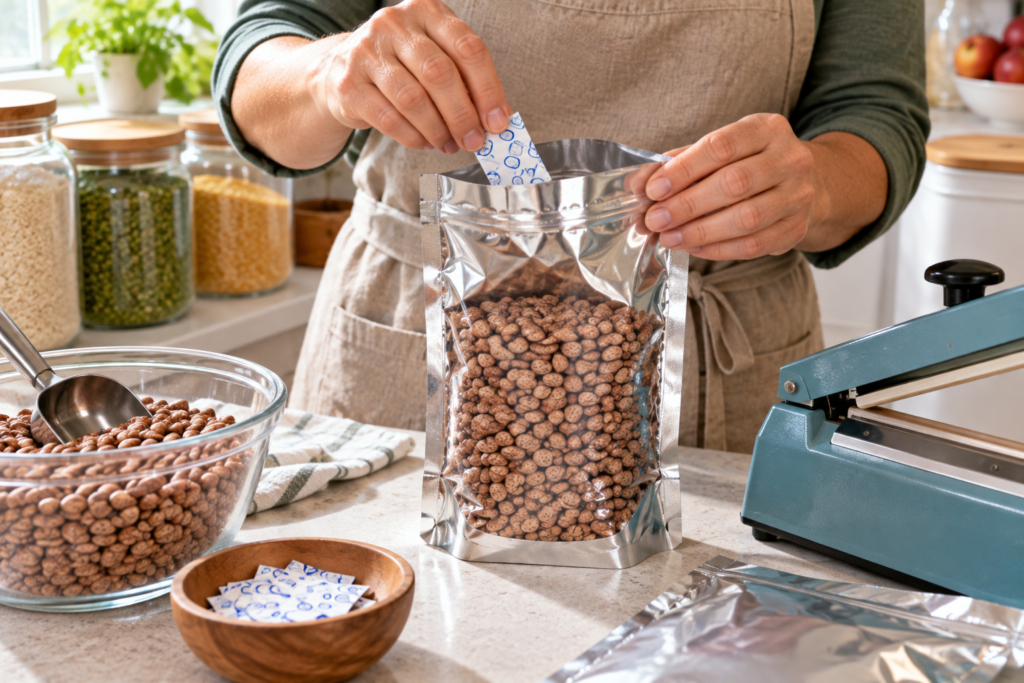
Mylar bags with oxygen absorbers: the workhorse for bulk dry goods like rice, beans, and flour; they stack into compact spaces.
Gamma lids on 5-gallon buckets: fast, durable access to bulk staples without breaking the seal each time.
Vacuum sealing: extends life for some items, but it needs a strong moisture barrier and a steady temperature, so it isn’t a universal fix.
Desiccants and indicators: silica gel or food-grade packs in humid spaces, plus humidity indicators to catch trouble before seals fail.
Moisture control matters as much as oxygen control, because absorbers work poorly in damp air. Here is a setup that holds up: pack 25 pounds of dried beans in a Mylar bag with a 300 cc oxygen absorber, slide it into a 5-gallon bucket with a gamma lid, and store it around 55°F. Tested a year later, the beans still have good texture. Size your absorbers to the container volume, and don’t rely on any one method alone.
Key takeaway: Build a layered container strategy: tight seals, absorbers sized to the container, desiccants where it’s humid, and clear labels. A mixed system beats any single method.
Preservation Techniques for True Longevity
Real longevity comes from choosing the right tool for the job, not chasing one magic method. Each technique has a place where it shines, and the skill is layering them so your food stays safe, tasty, and usable through outages and disruptions. Design around your food type, your space, and how reliable your power is, then map a simple rotation on top.
Know where each method earns its keep:
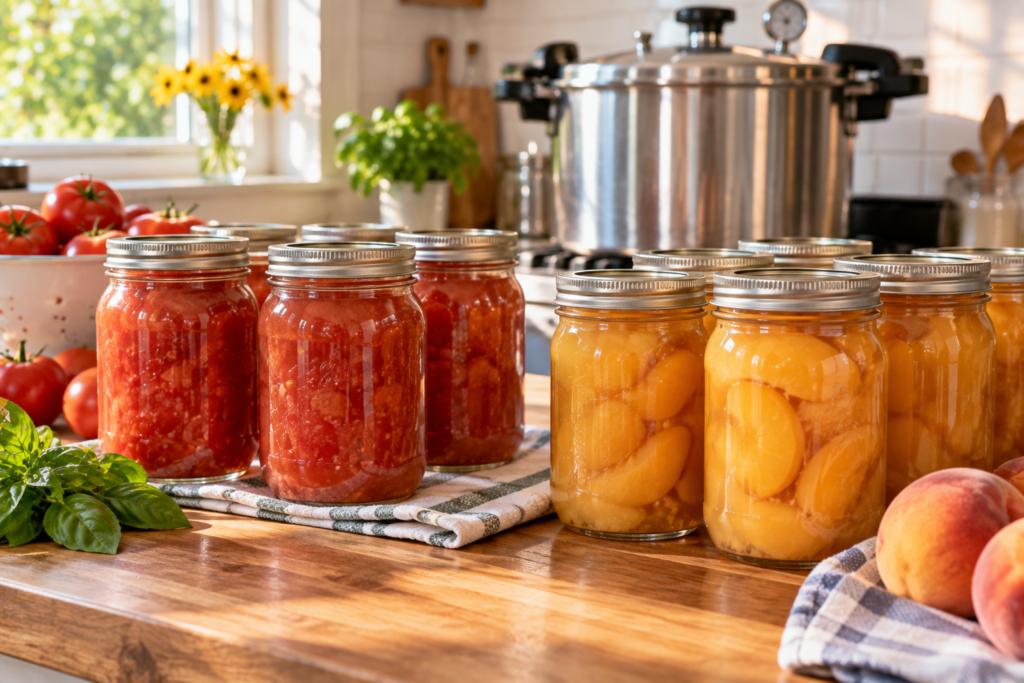
Pressure canning: for low-acid foods like meats, vegetables, and mixed dishes; it needs a certified canner and validated times, and it isn’t for dairy or oils.
Water-bath canning: faster and simpler for high-acid foods like fruits, jams, and pickles; hold safe acidity and stick to tested times.
Dehydration and freeze-drying: cut moisture, weight, and space; freeze-drying keeps structure and flavor but demands specialized equipment.
Freezing: keeps flavor and texture in proteins and prepared meals, but it leans on reliable power and guarding against freezer burn.
After a late harvest, you might pressure can 8 quarts of tomatoes, water-bath 6 pints of salsa, and dry a batch of peppers. When a two-week outage hits, the canned goods stay edible while the freezer sits offline. That mix is what builds resilience across scenarios, and it is worth practicing with small batches before you scale.
Key takeaway: Always follow tested processing times from reputable sources like the NCHFP and your local extension service. Improper canning invites safety failures, and clear naming and dating prevents confusion and waste.
Inventory, Labeling, and Rotation
Long-term storage lives or dies on a disciplined inventory system. Without one, even full shelves turn into waste and guesswork during a crisis. Three pillars carry the whole thing: clear labeling, a layout that supports rotation, and a tracking method light enough that you actually use it. Weaken any one and waste creeps in.
Keep the system simple and visible:
Label everything: content, packaging date, and batch number, matched to your tracking sheet.
FIFO flow: oldest stock at the front, new stock to the back, every time.
A lightweight tracker: a Google Sheet or a pocket notebook with item, size, date, quantity, location, and best-by.
A storage map: zones by category, a central index, and visible cues so nothing hides in the back.
3 Steps To a Rotation You’ll Keep:
Label at packing. Put content, date, and batch on every container as it goes in.
Shelve oldest-first. Front row for the oldest dates, new stock behind it.
Audit quarterly. Verify seals, discard anything past its safe window, reconcile counts, and adjust your next order.
A two-person household might track 30 pantry items in a shared Google Sheet, label each container, stack the oldest at the front, and run a quick weekly check. After three months, spoilage dropped noticeably and near-expiry items fell by roughly a quarter. Keep it lean, though: granular tracking backfires the moment you stop updating it.
Key takeaway: FIFO plus quarterly audits cuts pantry waste and lifts crisis readiness. Keep the system lean enough that you actually keep it up.
Contingency Planning for Outages, Off-Grid, and Pets
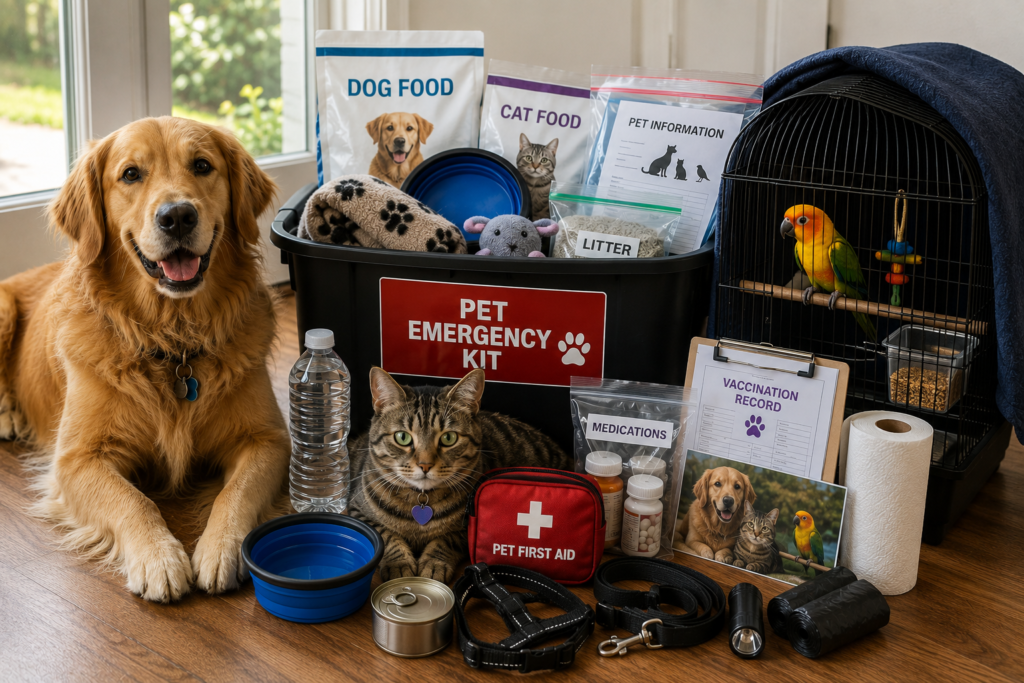
Power outages expose the gaps in any storage plan. A simple contingency framework keeps food safe, energy predictable, and pets covered when the grid goes dark. Ready.gov and the NCHFP both offer validated standards worth building on. Think in three tiers by how long the power stays out.
Immediate, 0 to 12 hours: minimize fridge and freezer openings, move the most temperature-sensitive items to the coolest space, monitor temps with a battery-powered thermometer, and lean on shelf-stable staples.
Short-term, 12 to 72 hours: shift to passive cooling and insulated containers, limit generator use to critical items, consolidate food into the coolest zone, and keep pet food sealed and separate.
Extended, 72-plus hours: rely on shelf-stable and preserved foods, use dehydration or canning where feasible, and keep pet food and water on independent storage.
During a 48-hour winter outage, one household kept perishable proteins in a basement nook that held around 50°F, used airtight containers for opened items, and ran a small generator intermittently for the chest freezer. They shifted to canned and dehydrated staples and avoided spoilage. The rule that carried them: cooling first, and only spend power on what truly needs it.
The trade-offs show up fast. A generator is reliable but costs fuel, upkeep, and noise; solar-plus-battery is quiet and steady but asks for upfront investment and limited peak power. Plan for several fail-safes: durable cool storage, a rotation-ready staple core, and pet supplies kept clearly separate.
Key takeaway: Protect a safe storage temperature first, then restore power with a mix of cooling and preservation. Run a seasonal outage drill so the plan is practical, not theoretical.
Final Thoughts
The pantry that looks boring today is the one that feels like a lifesaver during the next outage. None of this takes a big budget, just a cool corner, the right containers, a rotation you keep, and a plan for when the grid blinks. Set your climate baseline this week, stock a diverse core, and run one small outage drill this season. That is long-term food storage that quietly has your back.
Home » Blog » Long-Term Food Storage: Best Practices for Preppers
Long-term Food Storage: Best Practices for Preppers
October 10, 2026
1 View
SaveSavedRemoved0
Long-term Food Storage: Best Practices for Preppers
For Prepping, long-term food storage is the backbone of resilience, not a nice-to-have. This guide shares a practical, field-tested framework for building a climate-smart pantry that withstands power outages, weather events, and supply disruptions. You’ll gain clear steps on optimizing storage conditions, packaging, preservation methods, and a lean inventory system you can manage without breaking the budget.
Setting a Climate-Smart Foundation for Long-Term Food Storage
In the Prepping context, the climate foundation starts with the space itself. It means choosing storage zones that stay cool and dark most of the year. Target roughly 50-60°F (10-15°C) and humidity under 60% because this combination slows moisture migration, mold growth, and fat rancidity. If you can’t keep those temps year-round, prioritize deeper corners, stone walls, basements with insulation, and use airflow strategies to reduce heat buildup, then compensate with monitoring and a simple rotation plan.
Put sensors in representative zones: a cool corner behind the water heater, a middle shelf, and a bulk-storage area. Use min-max thermometers and hygrometers; set alerts for drastic changes. Build a scalable storage plan from an initial target of 2-3 months of stock to a longer baseline as space and budget allow. This guardrail helps prevent silent spoilage and wasted prepper supplies.
There’s a real trade-off between pushing for lower temps and energy use. In hot climates or rental setups, keeping 50°F can spike bills. Favor passive cooling: shaded zones, proper insulation, sealing drafts, and airflow. If power is unreliable, segment storage so a single failure doesn’t ruin the entire stock. Watch for condensation and moisture; ensure containers stay dry and seals intact.
Key climate targets: cool, dry storage. Aim for 50-60°F (10-15°C) and RH under 60% to maximize shelf life.
Concrete example: in a humid midwestern basement, a prepper designates a climate-smart shelf behind a water heater closet. They install a small dehumidifier, one digital min-max thermometer close to the wall, and a humidity sensor near bulk bins. They store 70 pounds of dried beans in 5-gallon airtight buckets with gamma lids and label each with content and date. They run a weather-based rotation: when outdoor humidity climbs above 65%, they increase airflow and move older stock to the front.
Takeaway: establish a climate baseline now and scale as space and budget allow.
Shelf-Stable Staples for a Resilient Prepper Pantry
Shelf-stable staples are the backbone of a resilient pantry. For prepping, focus on a core set of foods that deliver calories, protein, and fats with minimal fuss under pressure. Keep storage cool and dry and tailor setups to your climate instead of chasing perfect conditions. See Ready.gov food storage guidelines for baseline safety, then adapt to your space.
Storage decisions carry real trade-offs. More variety means more containers and rotating to avoid waste, but it also eats into limited space. Oxygen exposure and humidity speed up spoilage; pest pressure remains a constant risk. Plan for cost and time: cheaper staples can still be dependable if you pair them with a few higher-demand items.
Grains and legumes: white rice, oats, barley, lentils, and dried beans
Proteins in cans: tuna, chicken, sardines, beans (for texture and nutrition)
Fats and oils: coconut oil, powdered butter substitutes, shelf-stable shortening
Dairy and alternatives: powdered milk, evaporated milk, non-dairy creamers if used
Canned fruits and vegetables: mixed vegetables, peaches, tomatoes, fruit in juice
Concrete usage example: in a winter outage, a family could rely on a core bundle of 20–25 lb of white rice, 20–25 lb dried beans, a case of vegetables, several cans of fruit, powdered milk, and a few jars of cooking oil. This setup supports simple, one-pot meals for a week or two without frequent trips to the store.
Packaging and layout matter. Bulk staples store best in airtight 5-gallon buckets with gamma lids; dried foods benefit from Mylar bags with oxygen absorbers. Label everything with content and date and maintain a clear FIFO rotation—this keeps waste down and emergencies ready-to-go.
Key takeaway: Build a diverse core of shelf-stable staples across categories and implement a simple FIFO rotation to minimize waste and maximize emergency readiness.
Takeaway: Start with a climate-aware core and a simple rotation plan, then scale what you store as space and budget allow. Schedule quarterly checks to refresh stock and adjust your purchases for the next season.
Containers, Packaging, and Oxygen Control
Containers won’t save your food if oxygen and moisture slip in. In real-world prepping terms, you build a layered system: glass jars for quick access, Mylar bags with oxygen absorbers for long-term dry goods, and airtight 5-gallon buckets for bulk staples. Use only food-grade materials and never reuse containers that previously held chemicals or fuels. This approach reduces waste and keeps your stock ready under a variety of conditions.
Container options and when to use them
Glass jars, such as Mason or Ball jars, are best for small portions you expect to access regularly; they seal tightly and give a clear view of contents. Mylar bags with oxygen absorbers are your workhorse for bulk dry foods like rice, beans, and flour; they minimize oxygen and fit into compact spaces when stacked. Gamma lids on 5-gallon buckets let you access bulk staples without breaking the seal; they are fast and durable. Vacuum sealing can extend shelf life for certain items, but it is not a universal fix and relies on a strong moisture barrier and steady temperature.
Moisture control matters as much as oxygen control. Oxygen absorbers do not work well in damp air, so pair them with a barrier and desiccants in humid environments. Place silica gel packs or food-grade desiccants inside Mylar pouches and buckets where appropriate, and use humidity indicators in storage areas to catch rising moisture before seals fail. Temperature stability also helps the integrity of seals and slows quality loss.
Concrete Example: A prepper packs 25 pounds of dried beans in a Mylar bag with a 300cc oxygen absorber, then slides that into a 5-gallon bucket with a Gamma lid. Stored in a cool basement around 55°F, the setup keeps beans dry and ready for extended periods; after a year you still have good texture when tested. This shows how oxygen control plus bulk packaging saves space and reduces waste in a real world scenario.
Trade-offs and limits: The up front cost of Mylar bags, absorbers, and gamma lids adds to the initial outlay and labor. You need a heat sealer or access to pre sealed bags for true Mylar use, and you must size absorbers to the volume. Larger containers are great for bulk staples but take longer to rotate and require more space. Do not rely on one method alone; a mixed system that pairs accessible jars with bulk storage is more robust.
Key takeaway: Build a layered container strategy with tight seals, oxygen absorber sizing matched to container volume, and a clear labeling and rotation plan.
Takeaway: implement a layered container strategy now and pair it with a simple rotation plan to minimize waste and maximize readiness.
Preservation Techniques for True Long-Term Longevity
True long-term longevity comes from choosing the right tool for the job, not chasing a single magic method. Each technique has a domain where it shines, and the real skill is layering methods so your food stays safe, tasty, and usable through power outages and supply disruptions. In practice, you design around food type, storage constraints, and energy reliability, then map a simple rotation that keeps your stock viable years down the line.
Preservation Techniques and When They Shine
Pressure canning for low-acid items: Requires a certified pressure canner and validated processing times; it preserves meats, vegetables, and mixed dishes with years of shelf stability when done correctly. It’s not suitable for dairy or oils and relies on reliable, consistent heat and seal integrity.
Water-bath canning for high-acid foods: Faster and simpler, ideal for fruits, jams, pickles, and high-acid sauces. It hinges on maintaining safe acidity and sealed jars to prevent spoilage, with lower heat processing than pressure canning but still requiring strict adherence to tested times.
Dehydration and freeze-drying: Dries foods to minimal moisture, dramatically reducing weight and space. Dehydration is achievable with a good dehydrator; freeze-drying preserves structure and flavor but demands specialized equipment and careful handling of moisture content to avoid spoilage.
Freezing where feasible: Keeps flavor and texture intact for longer storage, especially proteins and prepared meals. It depends on dependable power or bandwidth for off-grid setups, and you must guard against freezer burn and temperature fluctuations.
Concrete use case: After a late harvest, you pressure can 8 quarts of tomatoes, 6 pints of salsa, and dry a batch of peppers for later use. When a two-week power outage hits, the canned goods stay edible and usable, while the freezer is offline. This mix demonstrates how combining methods creates resilience across scenarios.
A practical limitation to respect is energy and equipment cost versus reward. Pressure canners and dehydrators require upfront investment and regular maintenance. Freezing saves flavor but demands reliable power or off-grid backups. The trade-off is space, time, and skill: you gain shelf stability and flexibility, but you also take on more complex handling and quality checks to avoid safety risks.
Key takeaway: Always follow tested processing times and temperatures from reputable sources (NCHFP, extension services). Improper canning or drying invites safety failures; name, date, and batch tracking prevent混乱 and waste.
Takeaway: Align preservation methods with your food types, energy profile, and space. Build a two-method foundation you can rely on year-round, plus one backup technique for outages, and practice with small batches before scaling.
Inventory Management, Labeling, and Rotation Systems
Effective long-term storage hinges on a disciplined inventory system. Without it, even well-stocked shelves become waste and uncertainty during crises. This section lays out a practical framework you can implement with minimal friction.
A practical framework: FIFO-first-in, first-out
Three pillars drive reliability: labeling, a storage layout that supports rotation, and a lightweight tracking method you actually use. If any pillar is weak, waste creeps in and readiness suffers.
Label all containers clearly with content, date of packaging, and batch number; use a consistent file name convention on the container and in your tracking sheet.
Rotation protocol: implement a simple FIFO flow; place oldest stock at the front of shelves or in the front row of bins, and routinely move new stock to the back.
Tracking system: choose a lightweight method—Google Sheets or a pocket notebook—fields include item, size, packaging date, quantity, storage location, and best-by date.
Audit cadence: run a quarterly review to verify seals, discard items past safe windows, reconcile counts, and adjust purchasing plans based on actual usage.
Containers and locations: map storage zones by category; bulk staples in airtight 5-gallon buckets with gamma lids, singles in mason jars; keep a central index and visual map.
Contingency alignment: build rotation rules that scale for outages, off-grid days, and power loss; designate priority items to access during cooling constraints.
Concrete use-case: a two-person household tracks 30 pantry SKUs in a shared Google Sheet. They label each container, stack oldest products at the front, and perform a quick weekly check. After three months, spoilage dropped noticeably and items nearing expiry fell by roughly a quarter.
A practical insight: more granular tracking can backfire if the team stops updating. Keep it lean—track core items, standardize date formats, and lean on visible cues for the rest. The point is to create a reliable rhythm, not to chase perfect data on every SKU.
Key takeaway: FIFO plus quarterly audits dramatically reduces pantry waste and improves crisis-readiness; expect a meaningful reduction in spoilage with consistent discipline.
Takeaway: implement this labeling and rotation framework now and schedule your first quarterly audit within six weeks.
Contingency Planning for Power Outages, Off-Grid Living, and Pets
Power outages expose the gaps in any long-term storage plan. This section lays out a practical contingency framework that keeps food safety intact, energy use predictable, and pets protected when the grid goes dark or you’re living off-grid. See Ready.gov and NCHFP for validated storage standards that inform this approach. Ready.govNCHFP
Three-tier contingency framework
Immediate action (0–12 hours): Minimize fridge and freezer openings; move the most temperature-sensitive items to the coolest available space; verify you can monitor storage temps with a battery-powered thermometer; lean on shelf-stable staples to reduce cold-storage dependency.
Short-term (12–72 hours): Shift to energy-efficient cooling strategies (passive cooling, insulated containers); limit generator use to critical items; consolidate foods into the coolest zone; keep pet food sealed and separate from human staples.
Extended outages (72+ hours): Rely on shelf-stable staples and preserved foods; deploy dehydration or canning where feasible; reintroduce common meals in a controlled fashion once power returns; ensure pet food and water are maintained with independent storage.
Concrete example: During a 48-hour winter outage, we kept perishable proteins in a basement nook that stayed around 50°F, used airtight containers for opened items, and ran a small generator to intermittently power the chest freezer. We shifted to canned and dehydrated staples for meals, avoiding spoilage and waste. The key was sticking to the cooling-first rule and only using power for what truly needed it.
Practical trade-offs surface quickly. A generator delivers reliability but costs fuel, maintenance, and noise; solar-plus-battery systems provide quiet reliability but require upfront investment and limited peak power. Off-grid living demands redundancy and realistic expectations about weather, fuel, and storage capacity. Plan for multiple fail-safes: durable cool storage, a rotation-ready shelf-stable core, and a clear separation of pet supplies to avoid cross-contamination or contamination risk.
Key takeaway: Build contingency planning around preserving a safe storage temperature first, then restore power with a diversified mix of cooling, preservation, and storage strategies. Regular drills keep the plan practical, not theoretical.
Takeaway: Integrate contingency planning into your monthly prepper checks and run a simple outage drill once per season to validate timing, cooling effectiveness, and pet-supply readiness.
Cookies are small text files that can be used by websites to make a user\'s experience more efficient. The law states that we can store cookies on your device if they are strictly necessary for the operation of this site. For all other types of cookies we need your permission. This site uses different types of cookies. Some cookies are placed by third party services that appear on our pages.
Necessary cookies help make a website usable by enabling basic functions like page navigation and access to secure areas of the website. The website cannot function properly without these cookies.
Marketing cookies are used to track visitors across websites. The intention is to display ads that are relevant and engaging for the individual user and thereby more valuable for publishers and third party advertisers.
Preference cookies enable a website to remember information that changes the way the website behaves or looks, like your preferred language or the region that you are in.